Summary of installation procedure of Google OS 'ChromeOS Flex' to revive old PC to crisp operation
Chrome OS developed by Google is an OS that can perform most of the work with online services, and Chromebooks equipped with Chrome OS have gained great popularity in educational institutions and developing countries as machines that operate crisply while being inexpensive. `` ChromeOS Flex '', which made it possible to install Chrome OS on old PCs and MacBooks, was
Prepare for installation - Chrome OS Flex Help
https://support.google.com/chromeosflex/answer/11552529
◆ Contents
・ 1: Procedure to create a ChromeOS Flex USB installer
2: Procedure to install ChromeOS Flex on PC
・ 3: ChromeOS Flex initial setting procedure
・ 4: Comfort of ChromeOS Flex
◆ 1: Procedure to create a ChromeOS Flex USB installer
To install ChromeOS Flex on a PC, you first need to prepare a USB memory with a capacity of 8 GB or more and create a USB installer. It is OK to create the USB installer on a machine different from the one on which ChromeOS Flex is installed.
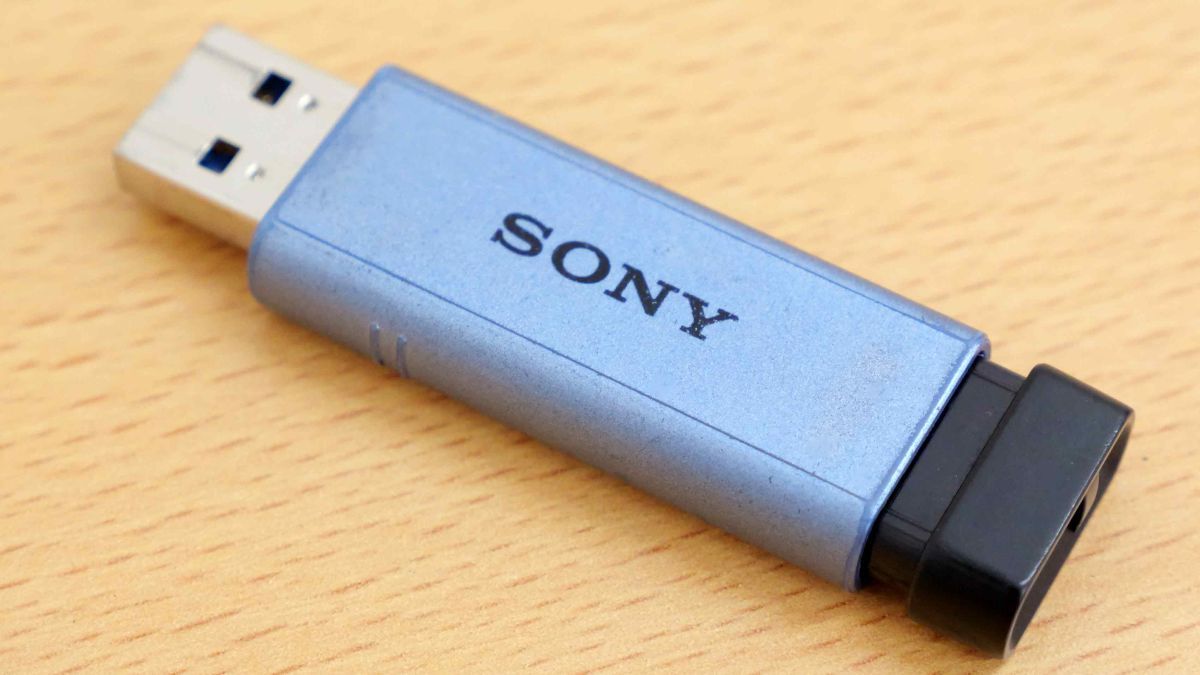
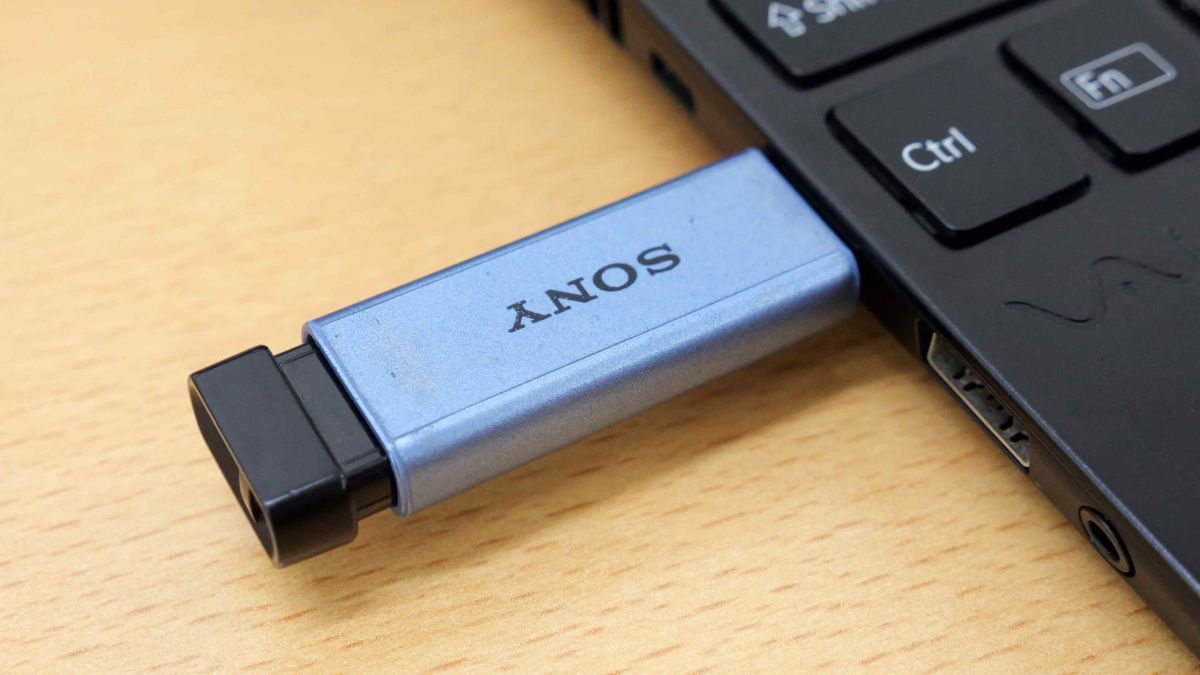
When creating a USB installer, the data saved in the USB memory is completely deleted, so if the necessary data is saved, it is necessary to move the file to another location. Also, SanDisk USB drives may fail to create a USB installer. This time, we prepared a USB memory with a capacity of 16 GB made by Sony.
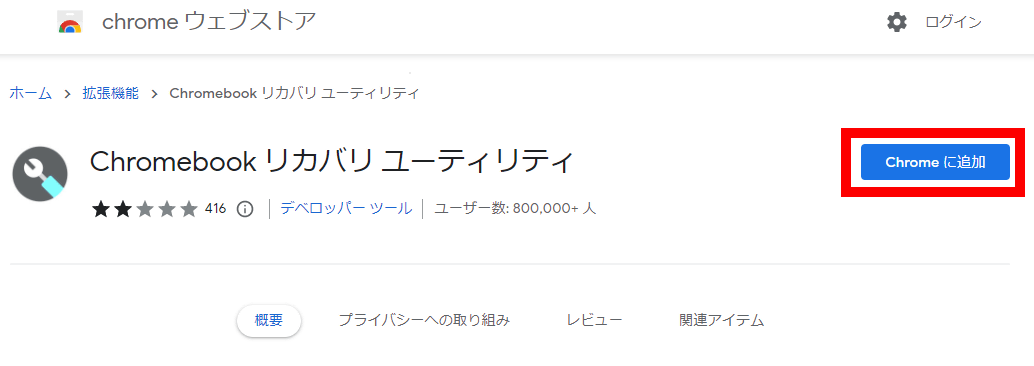
After preparing a USB drive, install the extension 'Chromebook Recovery Utility' for creating a USB installer in Google Chrome. First, access the following URL with Google Chrome.
Chromebook Recovery Utility - Chrome Web Store
When the 'Chromebook Recovery Utility' distribution screen is displayed, click 'Add to Chrome'.
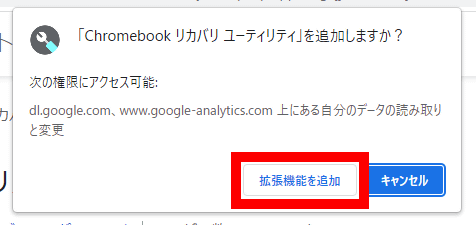
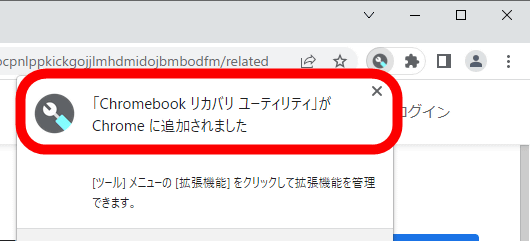
When the following popup appears at the top of the screen, click 'Add extension'.
Installation of 'Chromebook Recovery Utility' is complete when the following pop-up appears in the upper right corner of the screen.
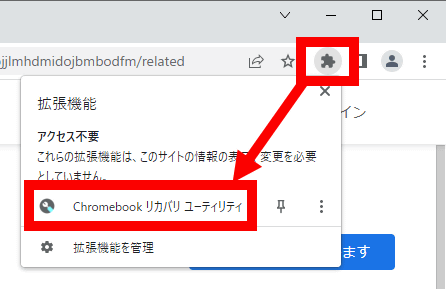
Then click on the puzzle piece icon in the upper left corner of the screen and click on Chromebook Recovery Utility.
When 'Chromebook Recovery Utility' starts up, click 'Start'.

When the following screen is displayed, click 'Select model from list' ... ...
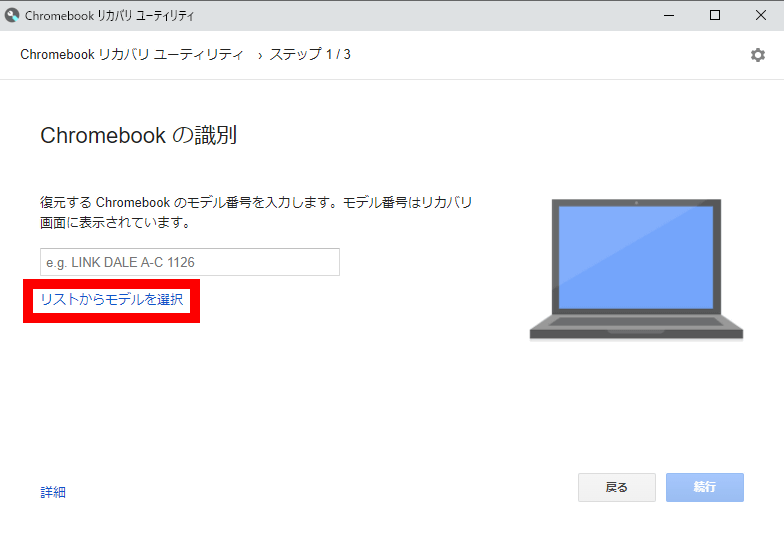
Select 'Google Chrome OS Flex' for the manufacturer and 'Chrome OS Flex' for the product, and click 'Continue'.

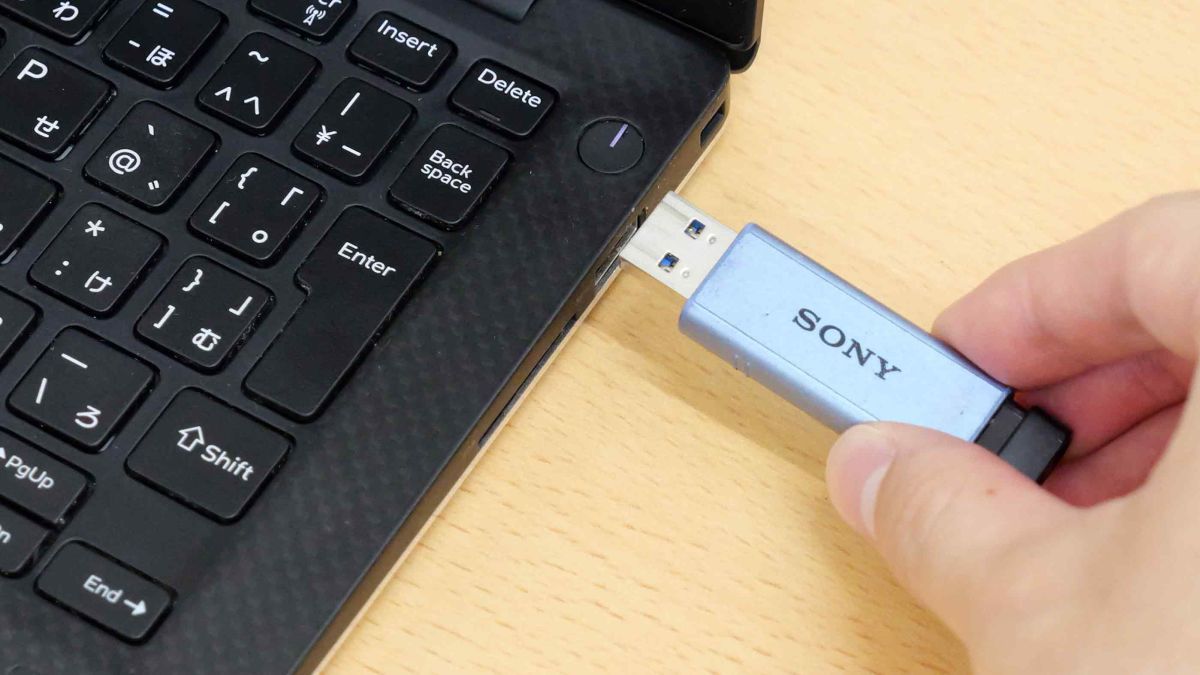
When asked to insert a USB drive ......
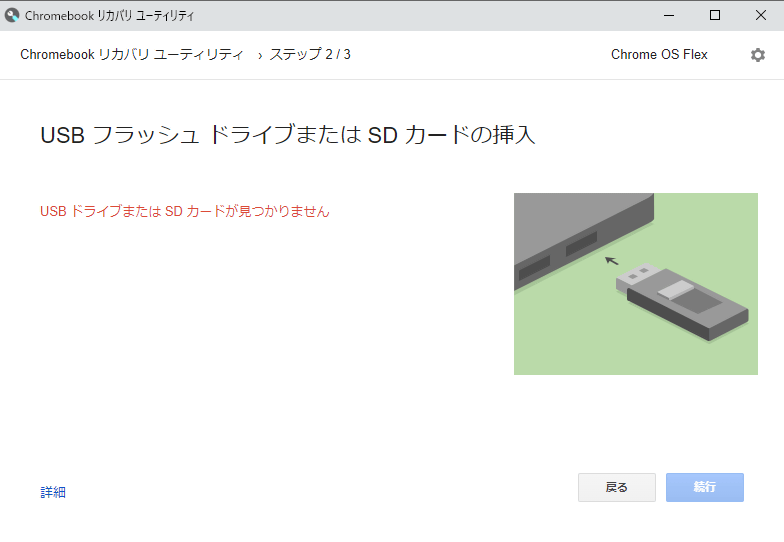
Insert the USB drive into your PC.
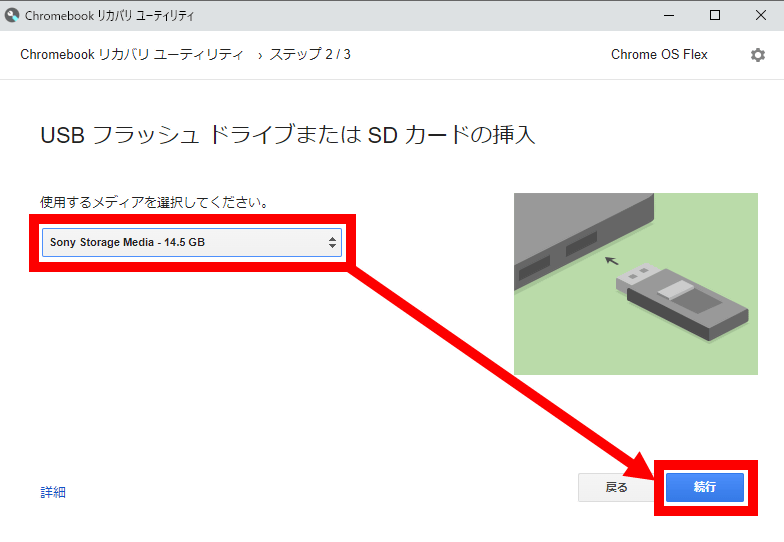
Next, select the inserted USB drive from the media selection field and click 'Continue'.
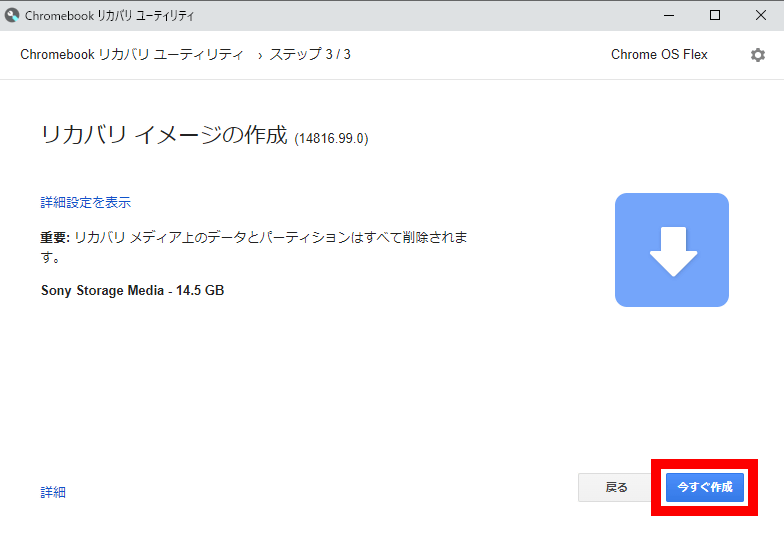
A confirmation screen for data deletion will be displayed, so click 'Create now'. If you click 'Create now', all the data in the USB drive will be deleted, so if there is necessary data, you need to back it up.
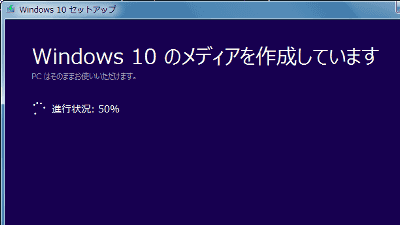
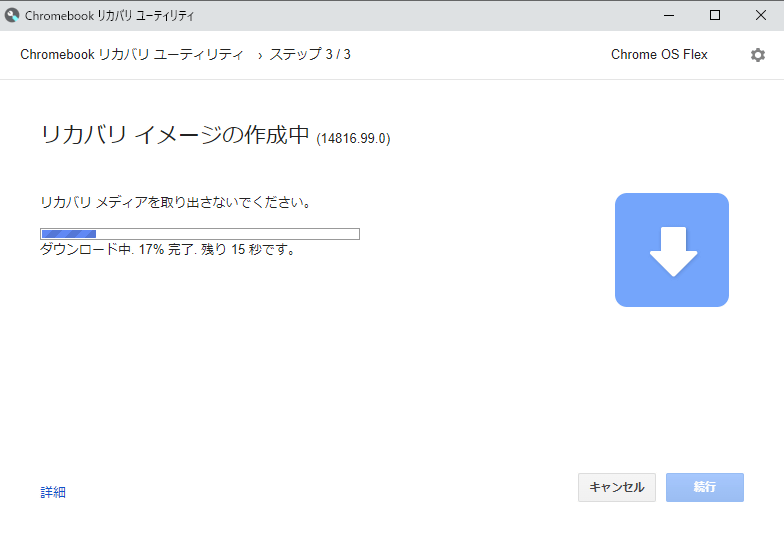
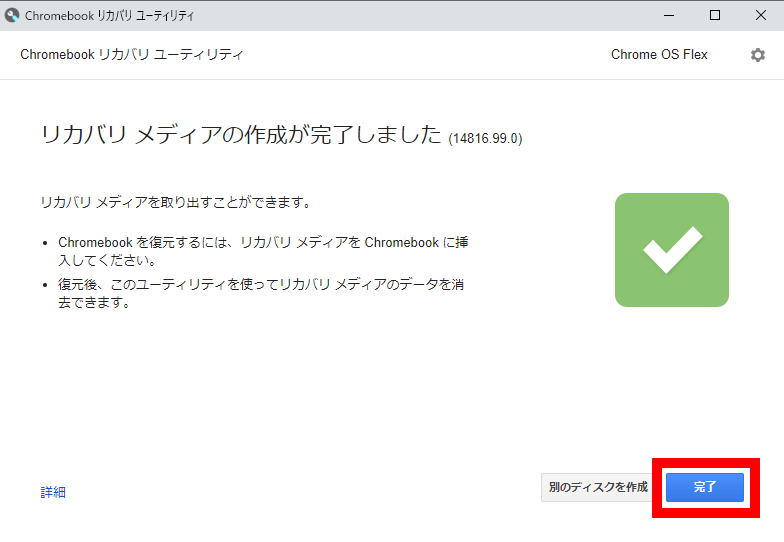
Leave it for a while until the creation of the USB installer is completed. This time it took about 10 minutes.
When the following completion screen is displayed, click 'Finish' and remove the USB drive from the machine.
◆ 2: Procedure to install ChromeOS Flex on PC
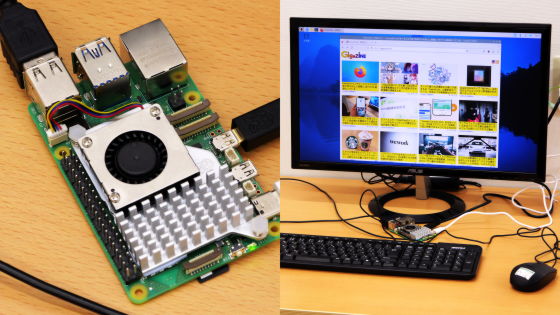
Machines installing ChromeOS Flex must have at least 4GB of memory and 16GB of storage. Google has published
First, insert the created USB installer into your machine and press the power button.
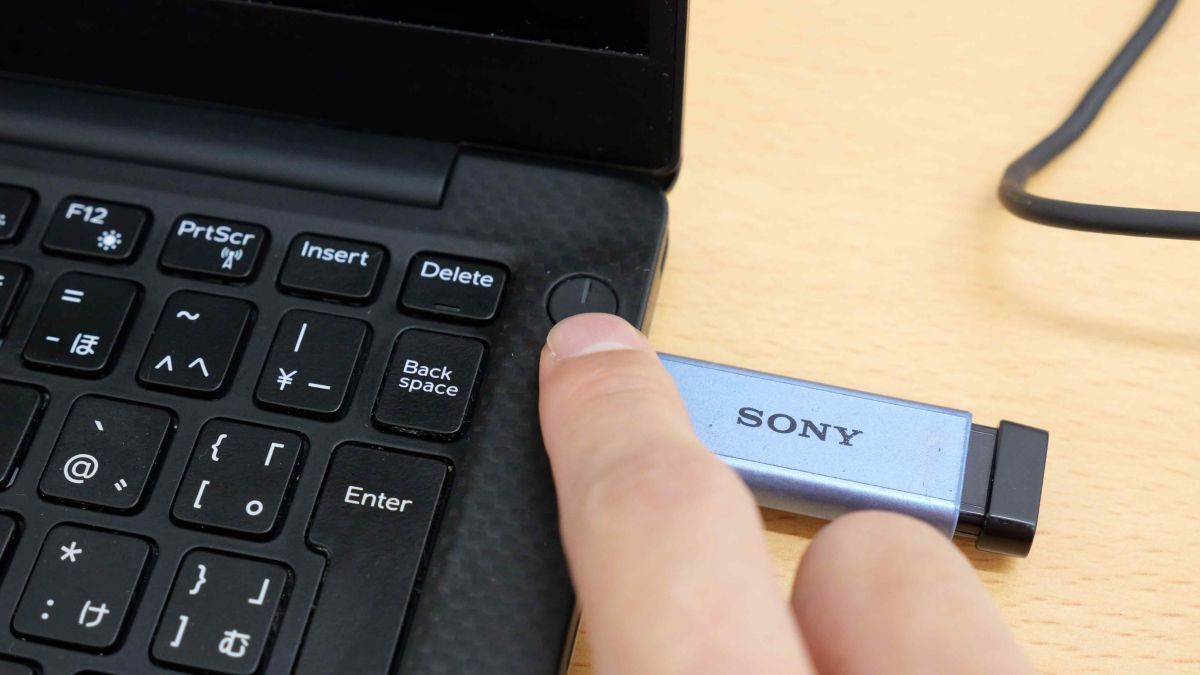
After pressing the power button, hit

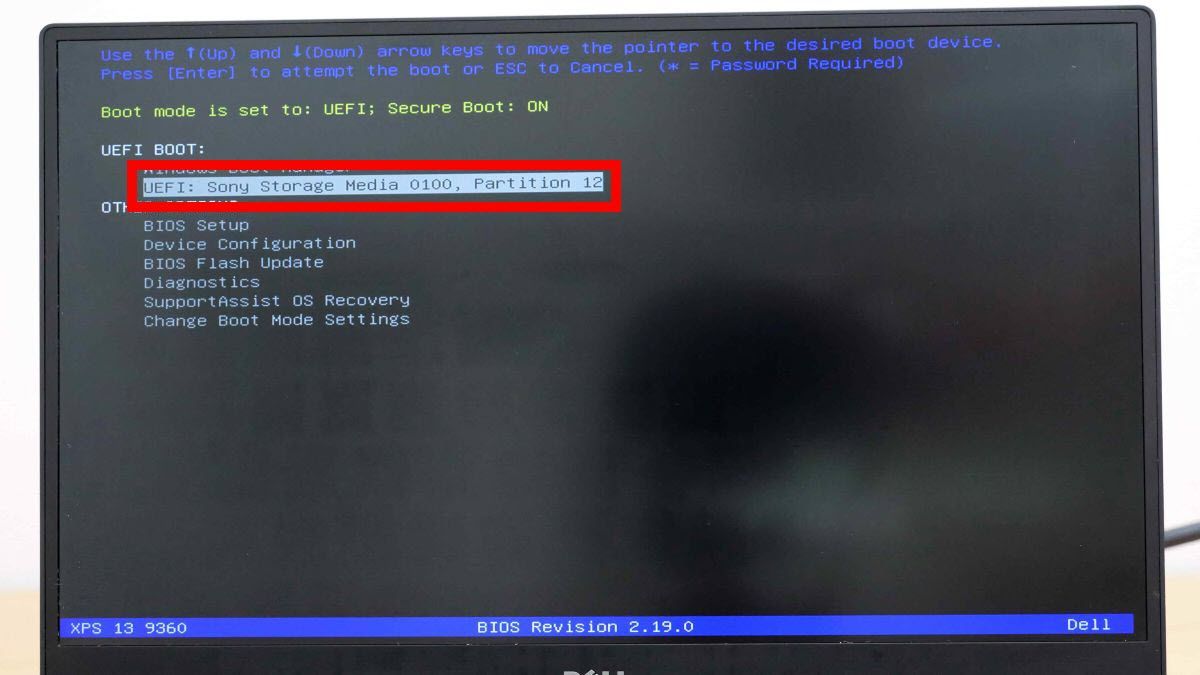
Then, the following boot drive selection screen will be displayed, so search for the name of the USB installer and select it.
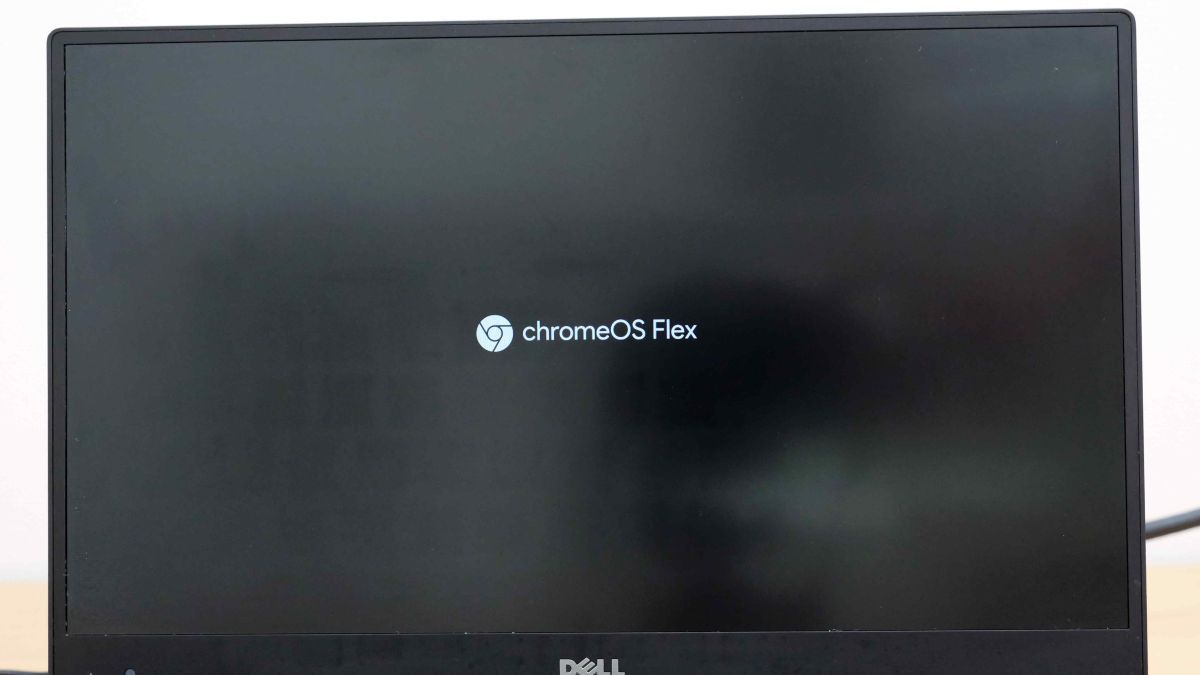
When you select the boot drive, the ChromeOS Flex logo is displayed after the screen darkens ...
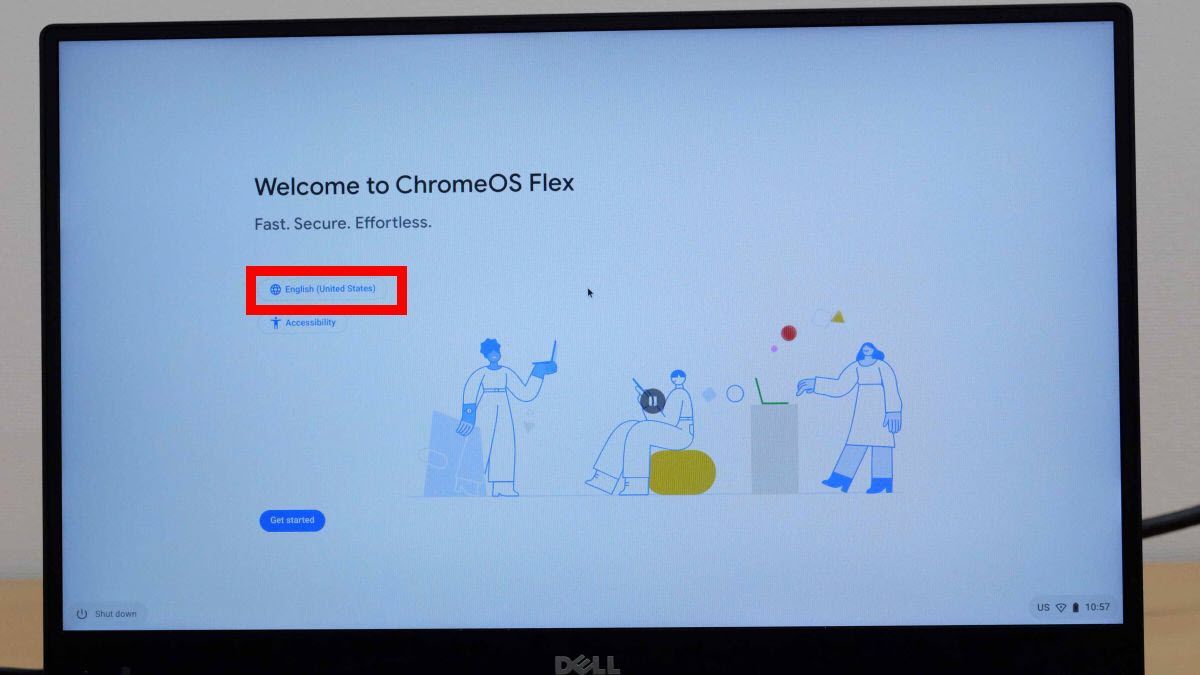
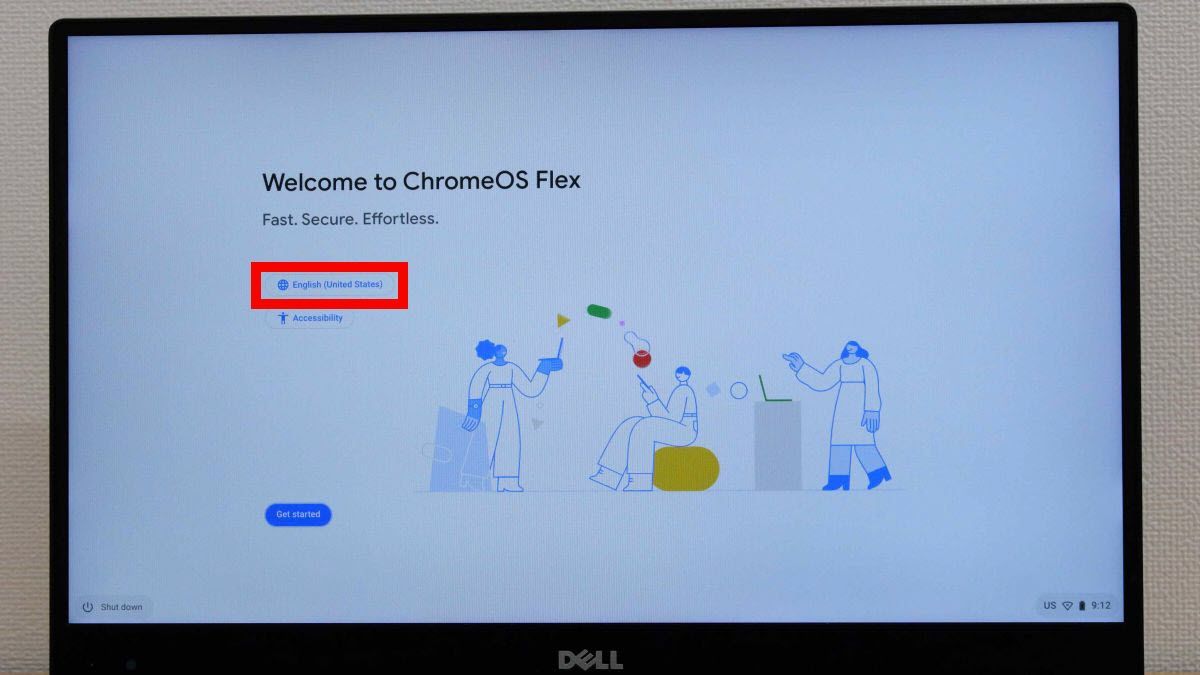
After a while, the ChromeOS Flex installer will start. Since the language is English, click 'English (United States)' in the red frame to change to Japanese.
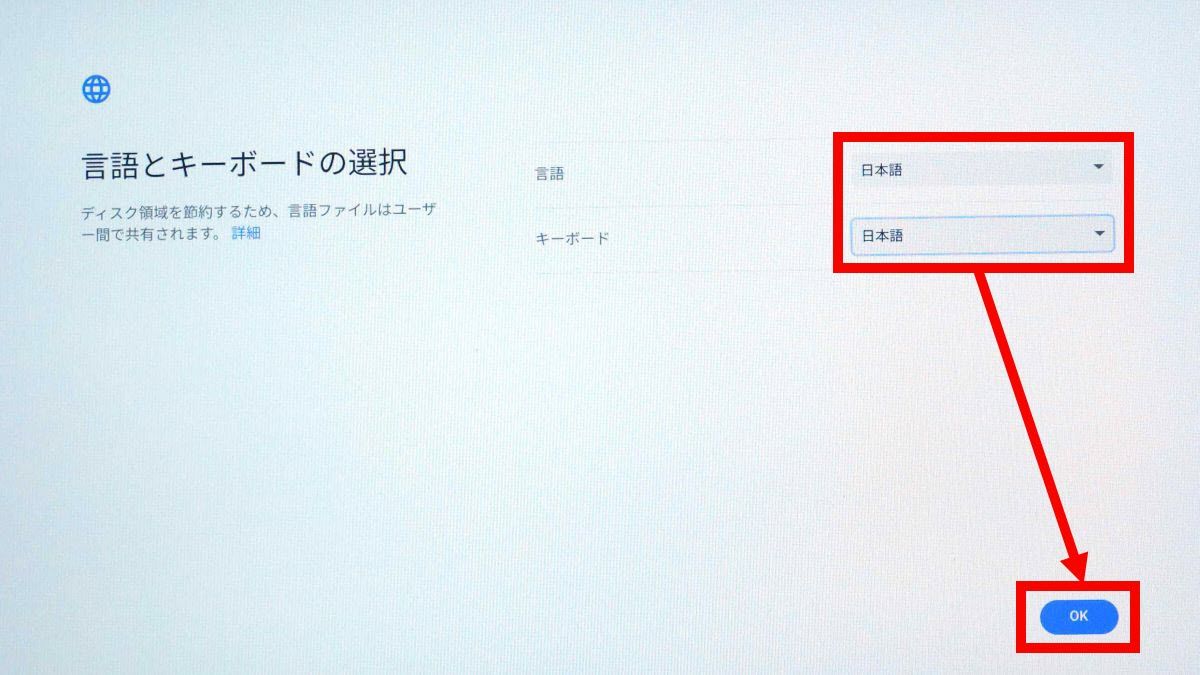
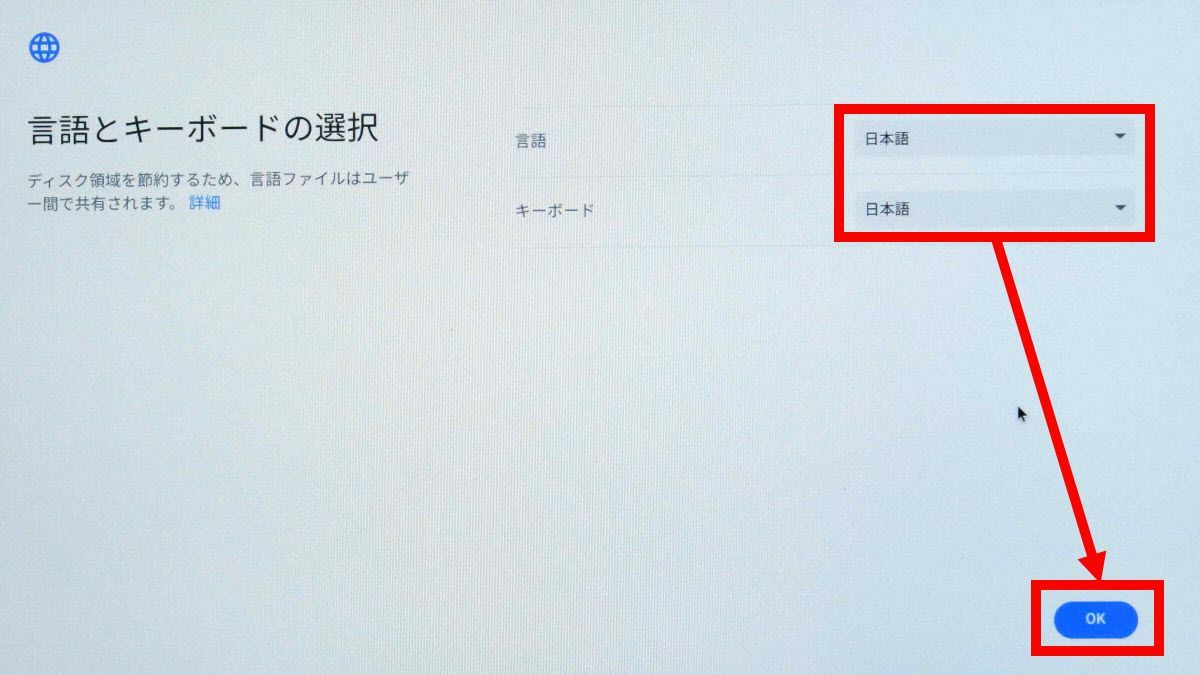
When the language selection screen is displayed, set both the language and keyboard to 'Japanese' and click 'OK'.
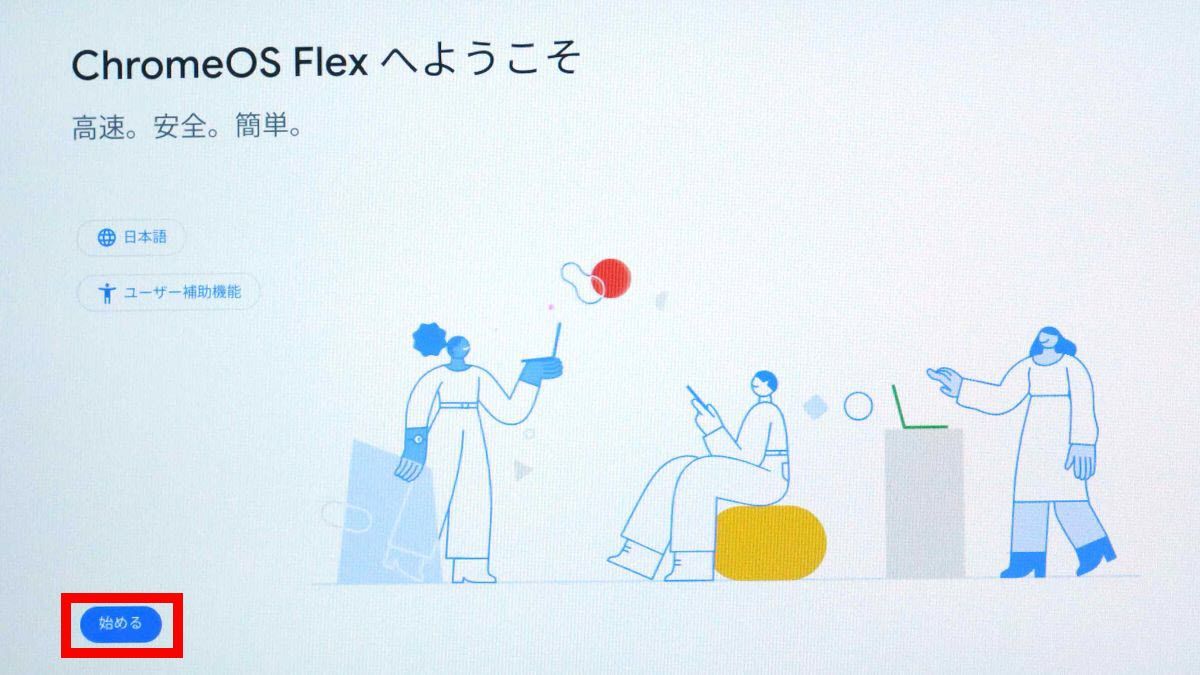
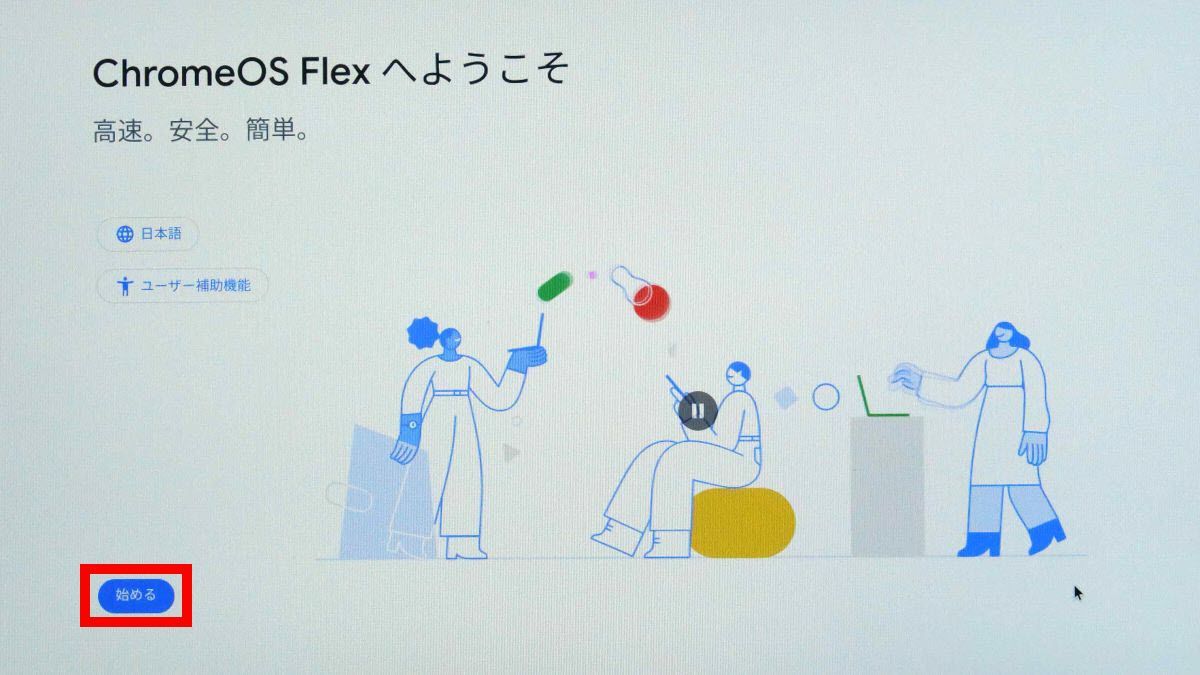
After confirming that it is displayed in Japanese, click 'Start'.
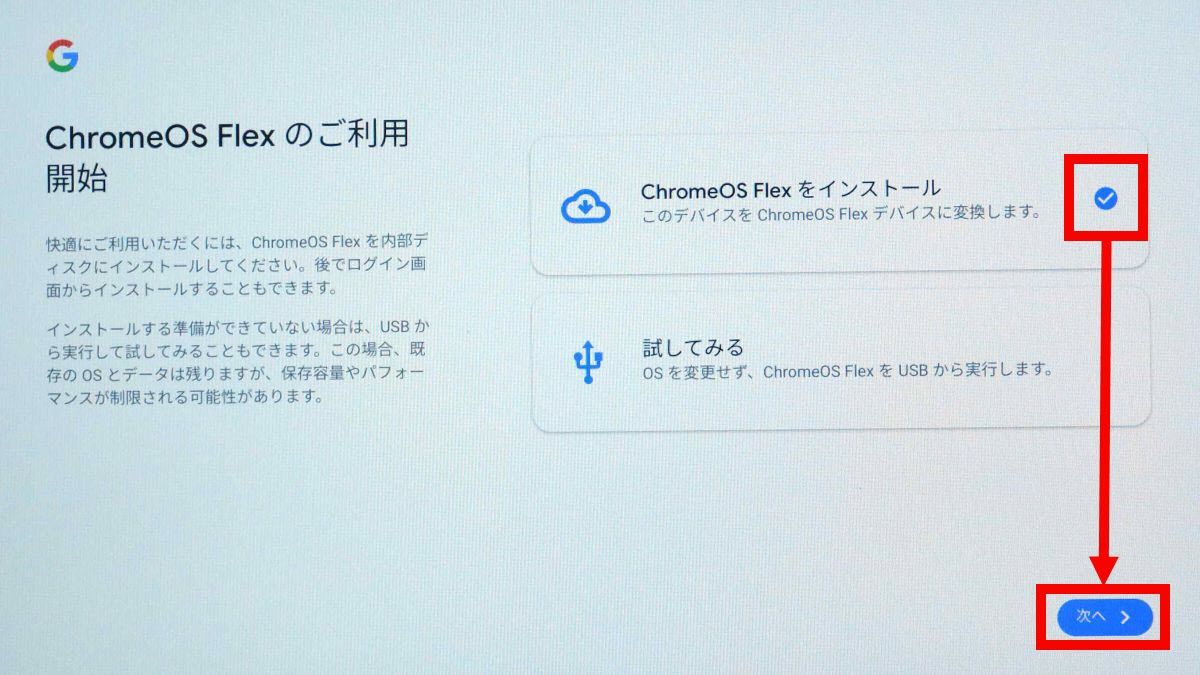
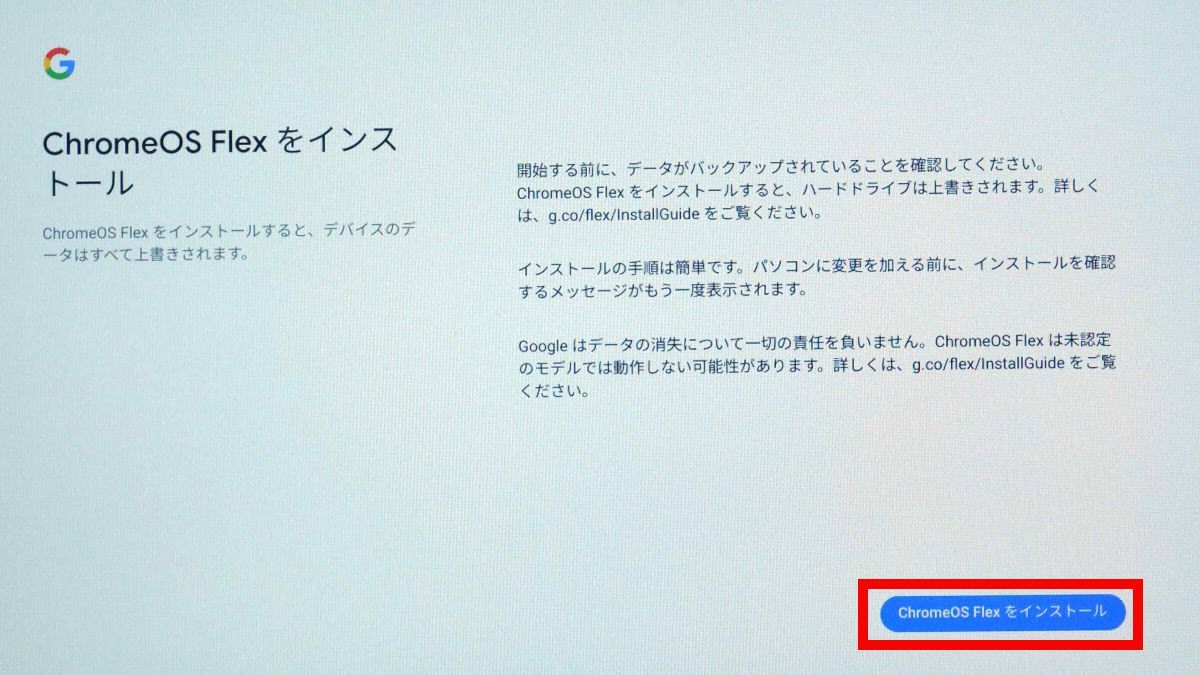
Next, check 'Install ChromeOS Flex' and click 'Next'. If you select 'Try', you can check the operation of ChromeOS Flex before installation.
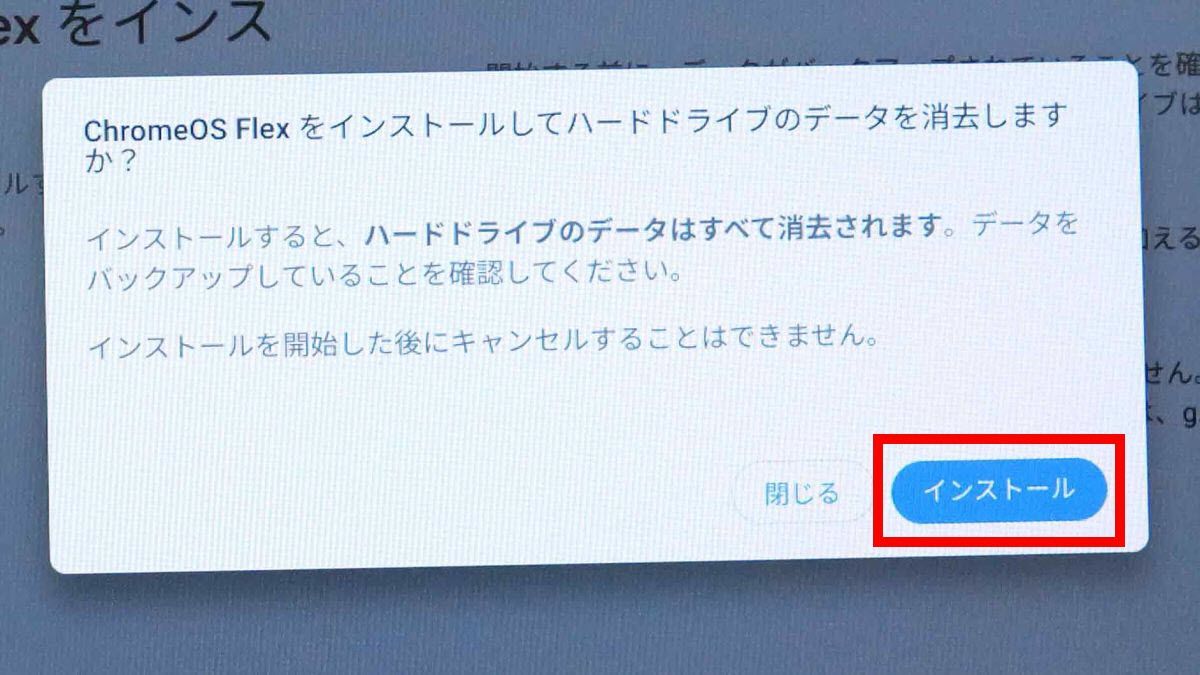
When the data deletion confirmation screen is displayed, click 'Install ChromeOS Flex'.
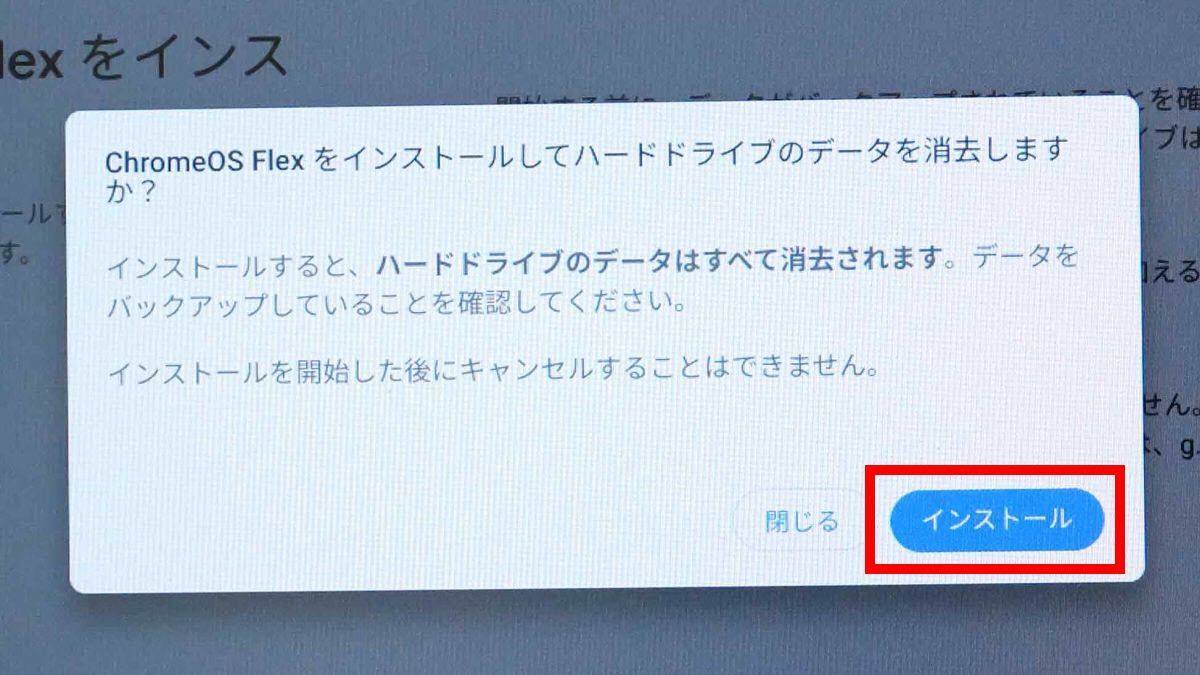
Then, a data deletion pop-up screen will be displayed, so click 'Install'.
This should have completed the installation, but this time I got an error screen saying 'Installation could not be completed'.
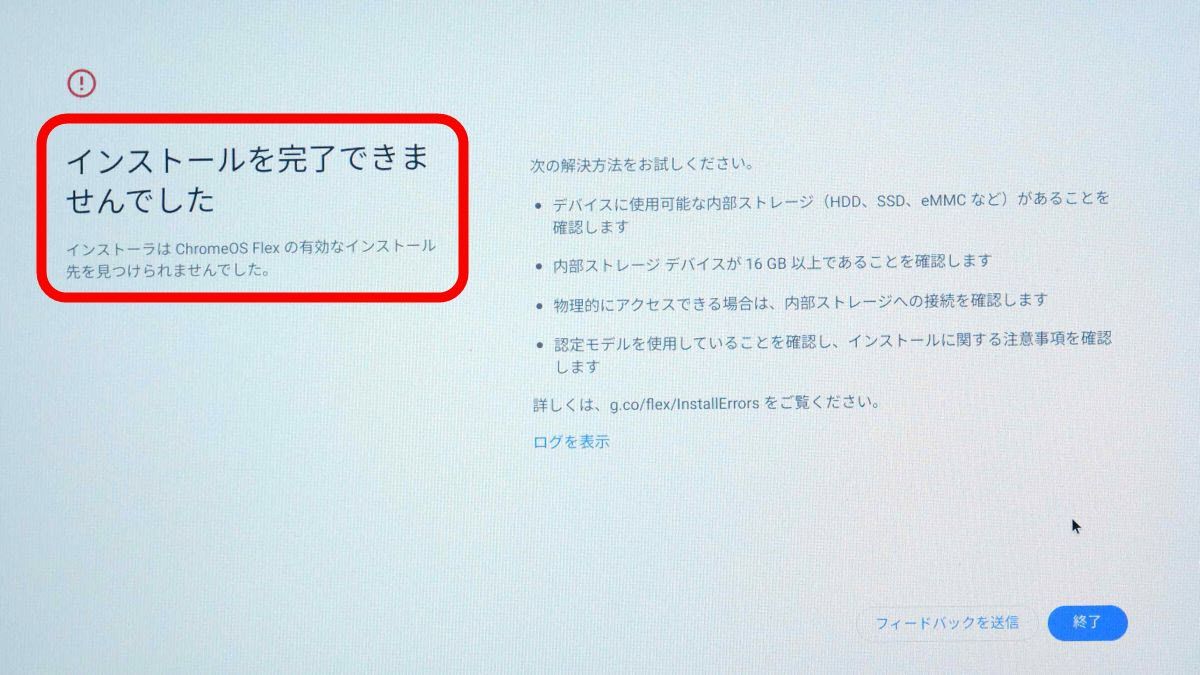
When I checked Google's help page , it was written to switch the storage mode from 'RAID' to 'AHCI', so I changed the mode as instructed.
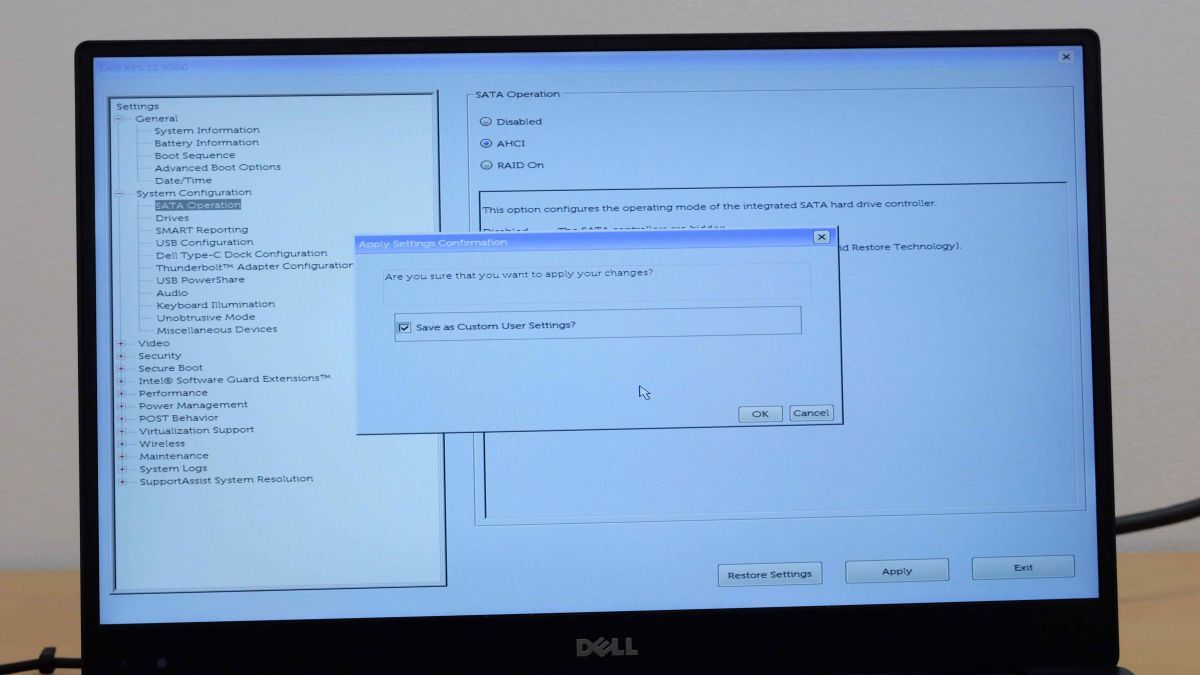
If you change the storage mode and proceed with the installation again ......
Installation completed successfully.
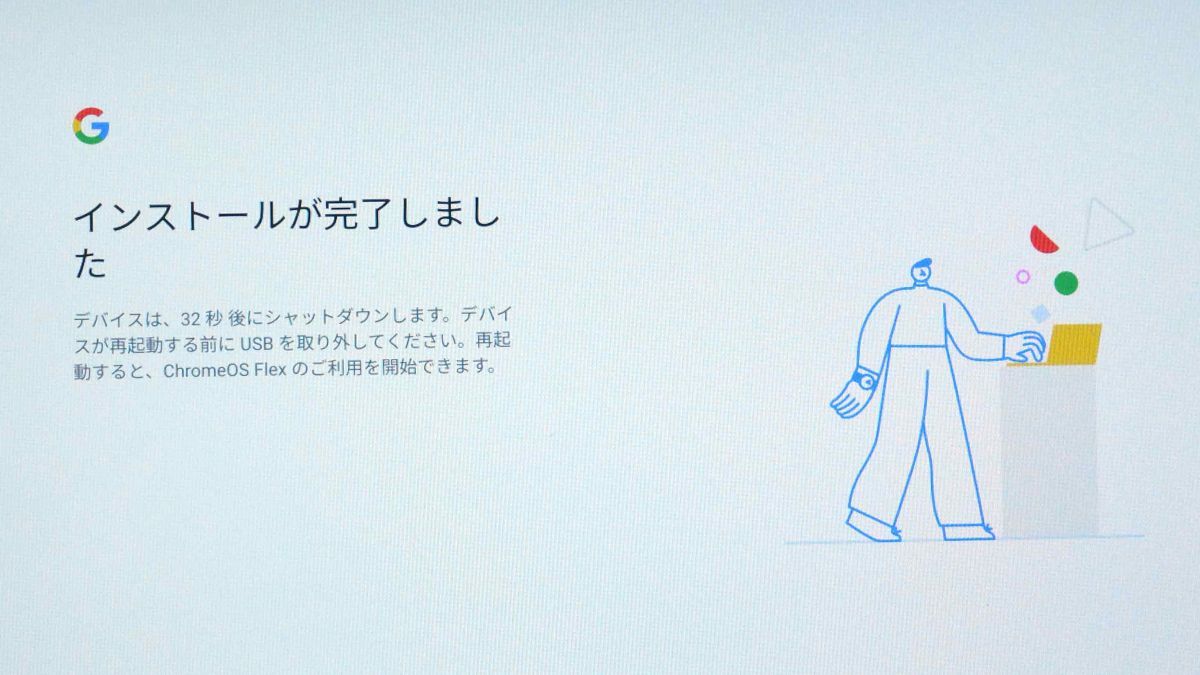
After the installation is completed, the machine will be shut down after a certain period of time, so remove the USB installer.
◆ 3: ChromeOS Flex initial setting procedure
After removing the USB installer, turn on the power to perform the initial settings. This time, even if I press the power button, the power does not turn on for some reason, and when I tried again after leaving it overnight, the power turned on safely. The cause is unknown.
When you start for the first time after installation, the language is English, so click 'English (United States)' ...
Set the language and keyboard to 'Japanese' and click 'OK'.
After confirming that it is displayed in Japanese, click 'Start'.
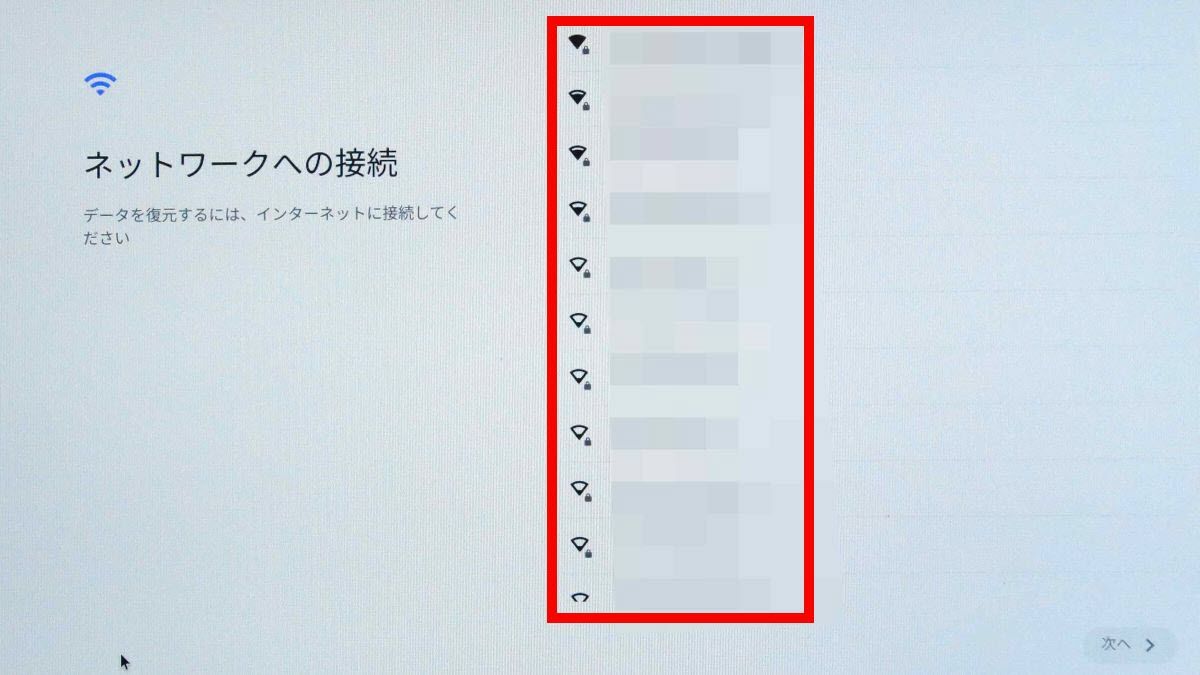
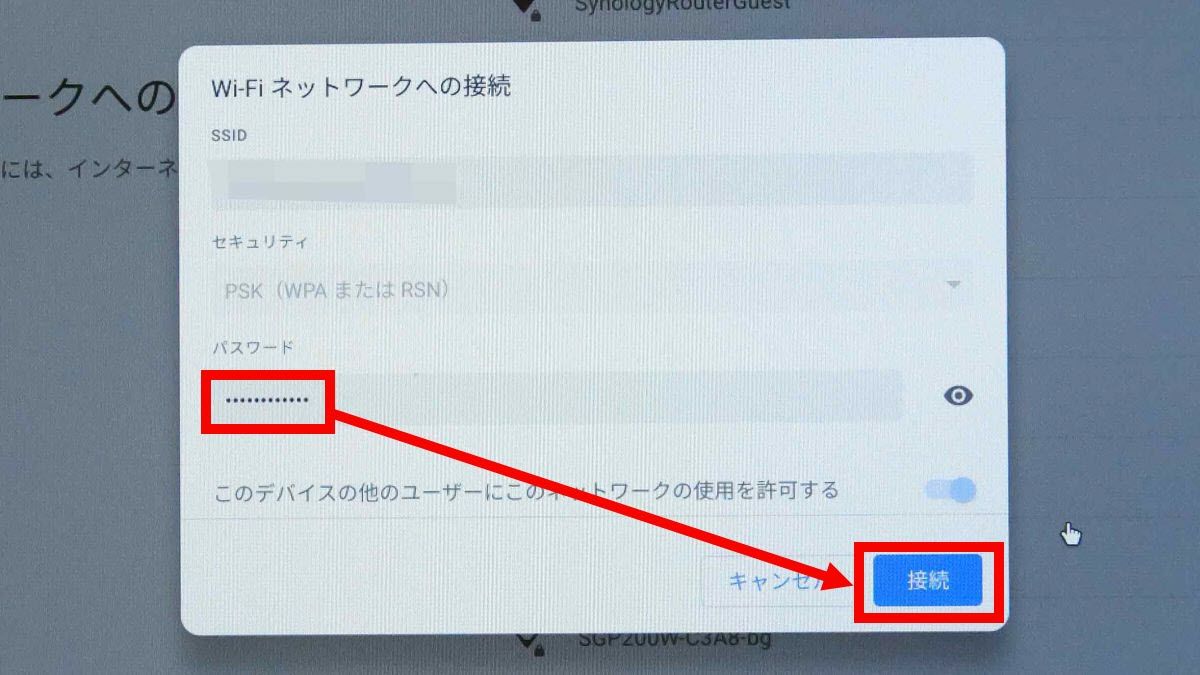
Then, you will be asked for an Internet connection, so select the connection destination ......
Enter the password for your Wi-Fi network and click Connect.
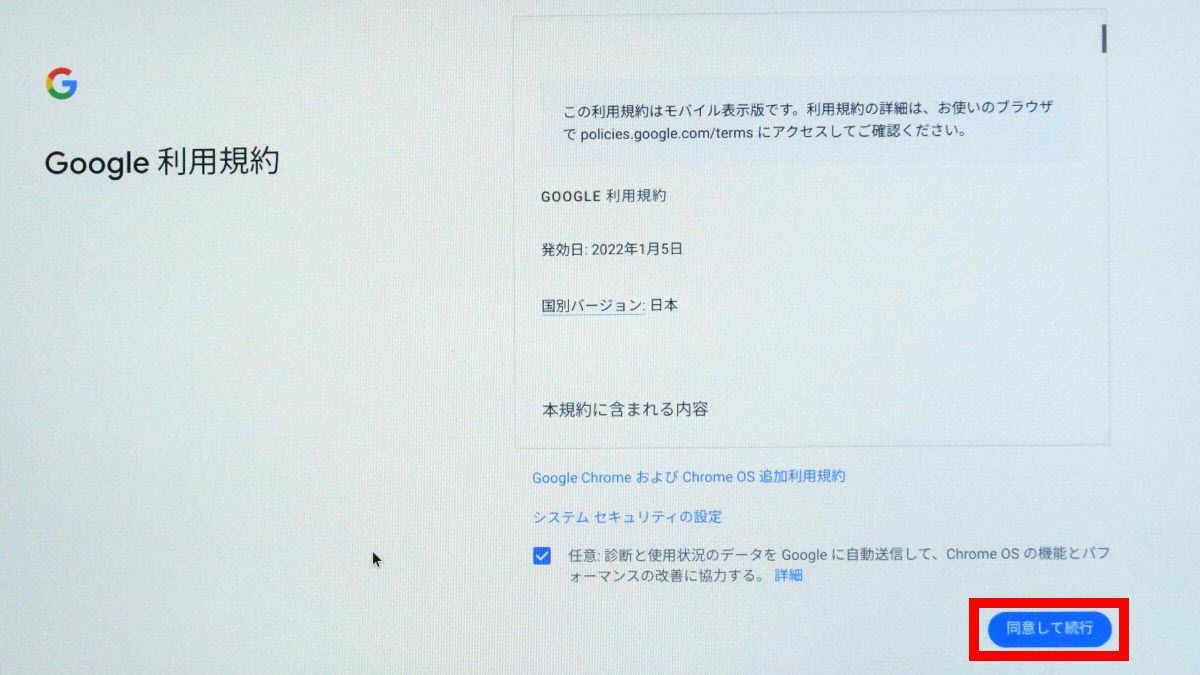
When the connection to the Internet is successful, the confirmation screen of the terms of use will be displayed, so read carefully and click 'Agree and continue'.
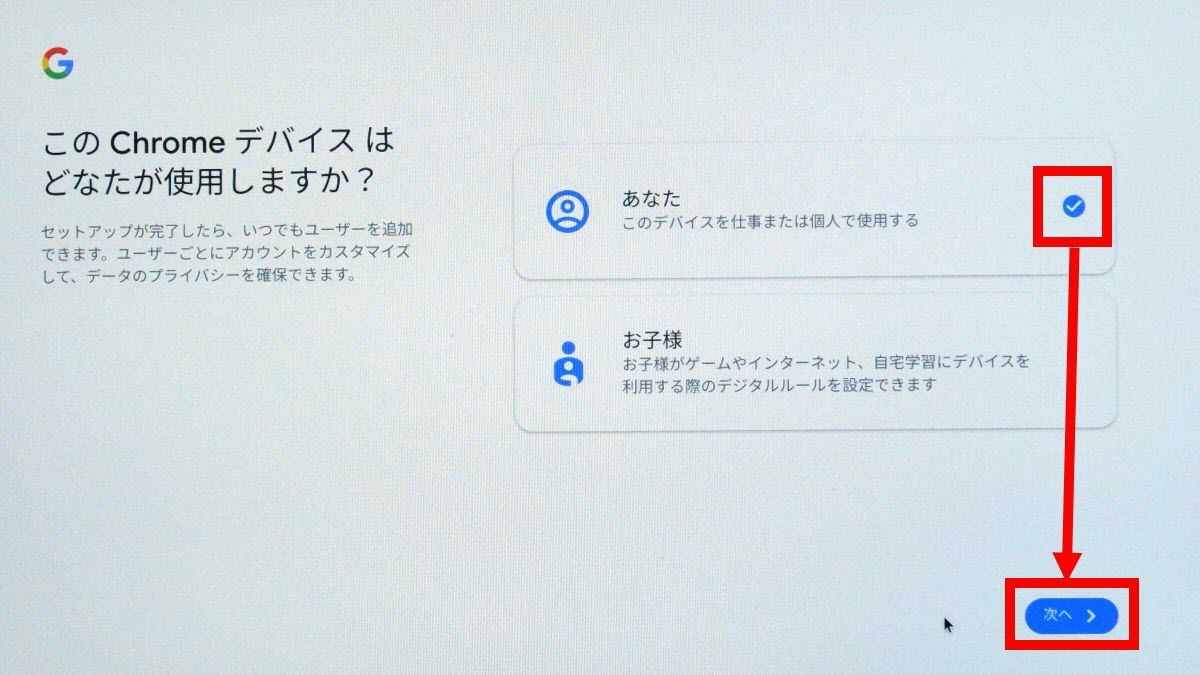
Next, the device user selection screen is displayed. Since I use it personally this time, I selected 'You' and clicked 'Next'.
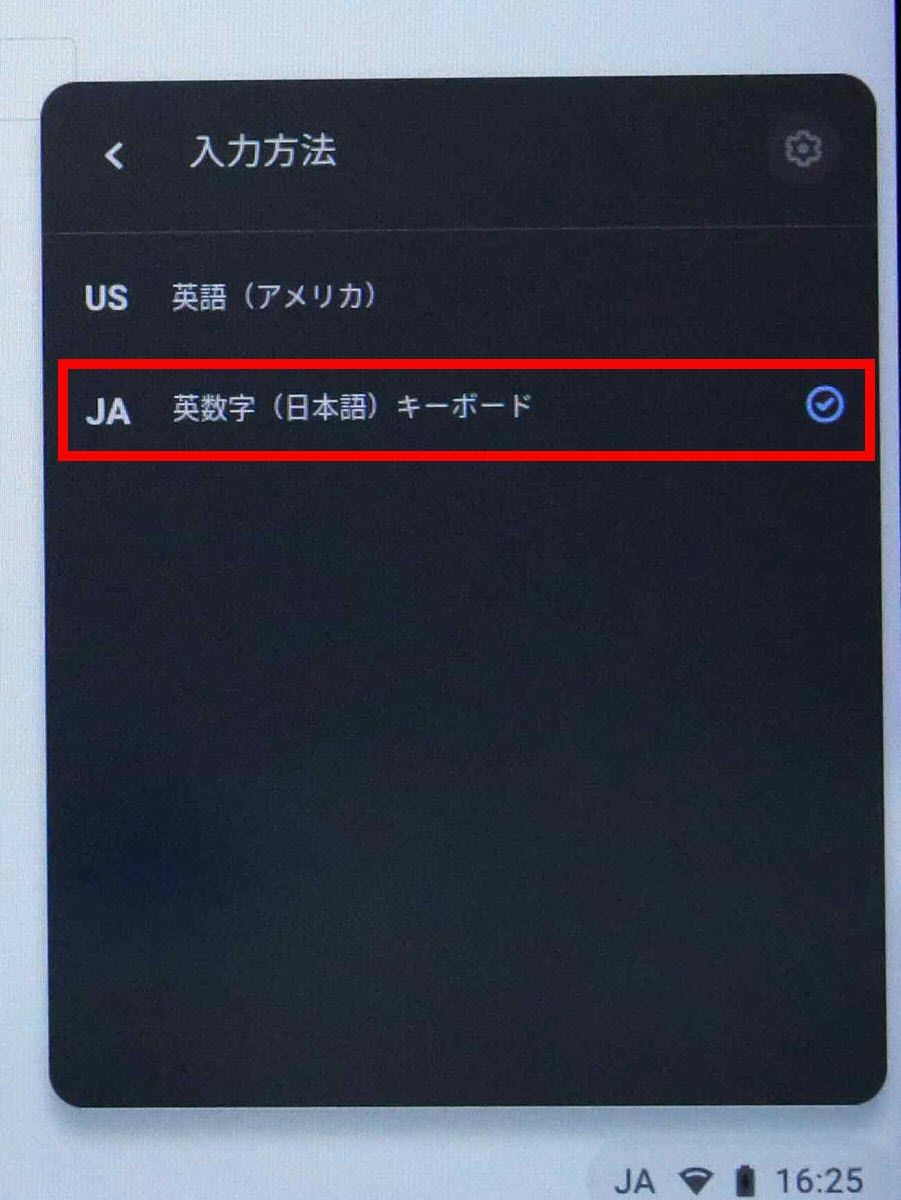
When the login screen is displayed, log in with your Google account. At this time, the keyboard was back to the alphabet layout setting, so click around the clock at the bottom right of the screen and click the part marked 'keyboard' ... ...
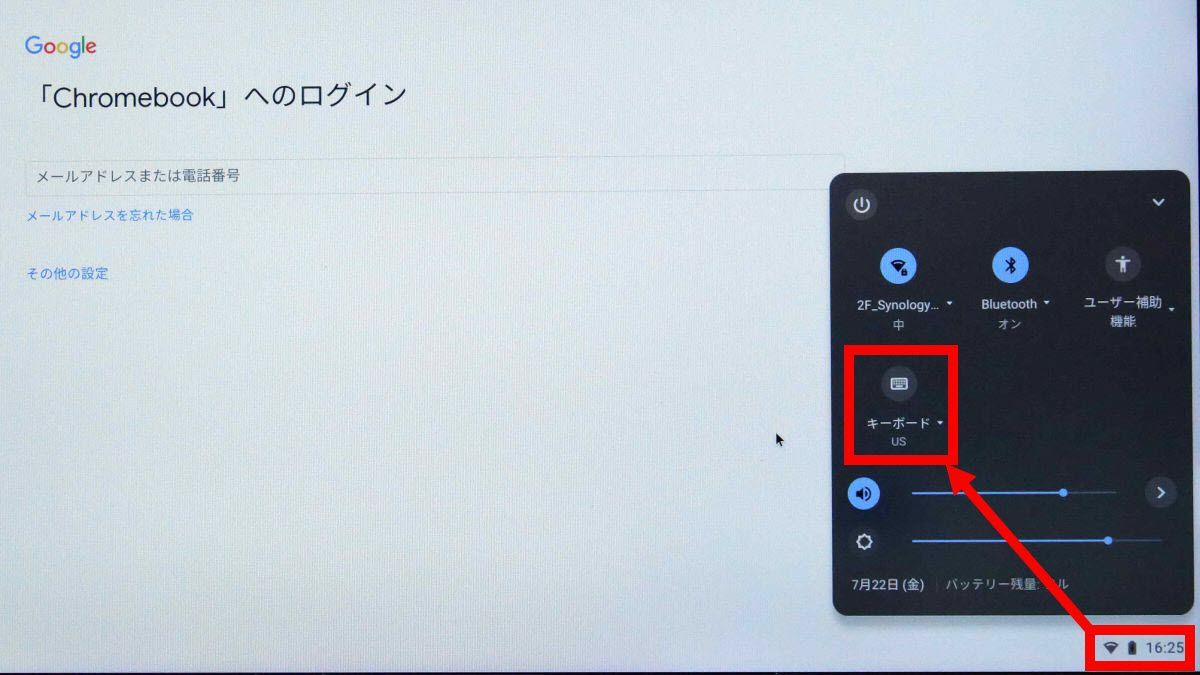
I chose the Japanese keyboard.
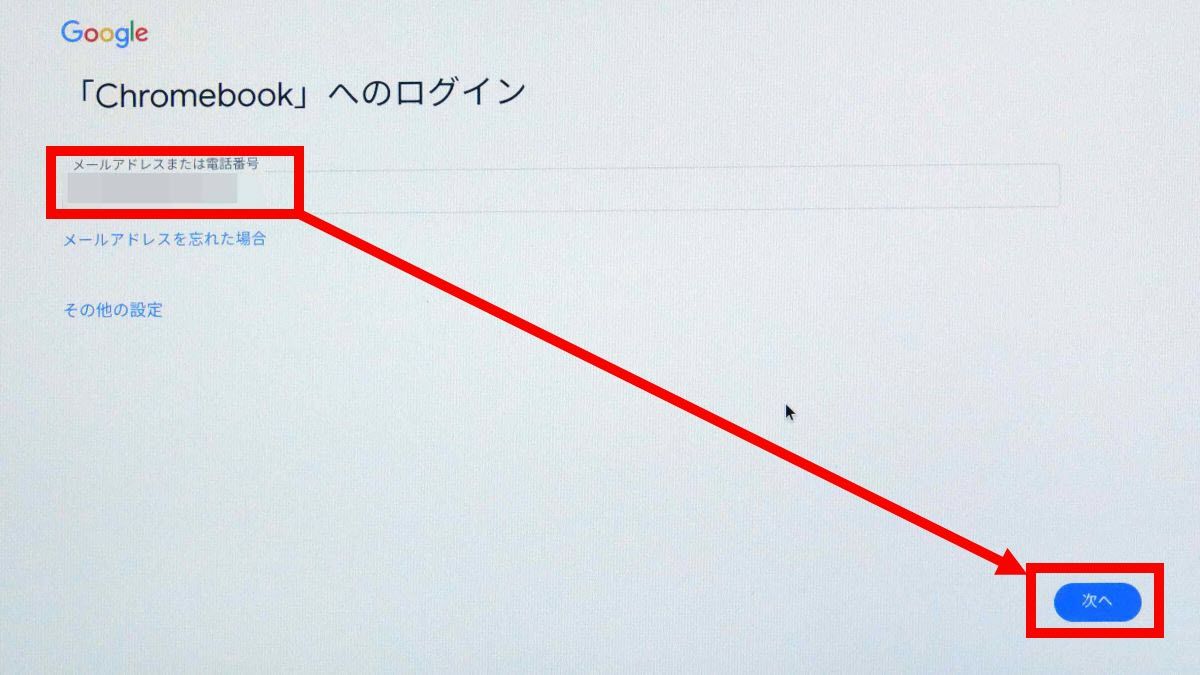
After setting the keyboard to Japanese layout, enter the email address in the input field and click 'Next'.
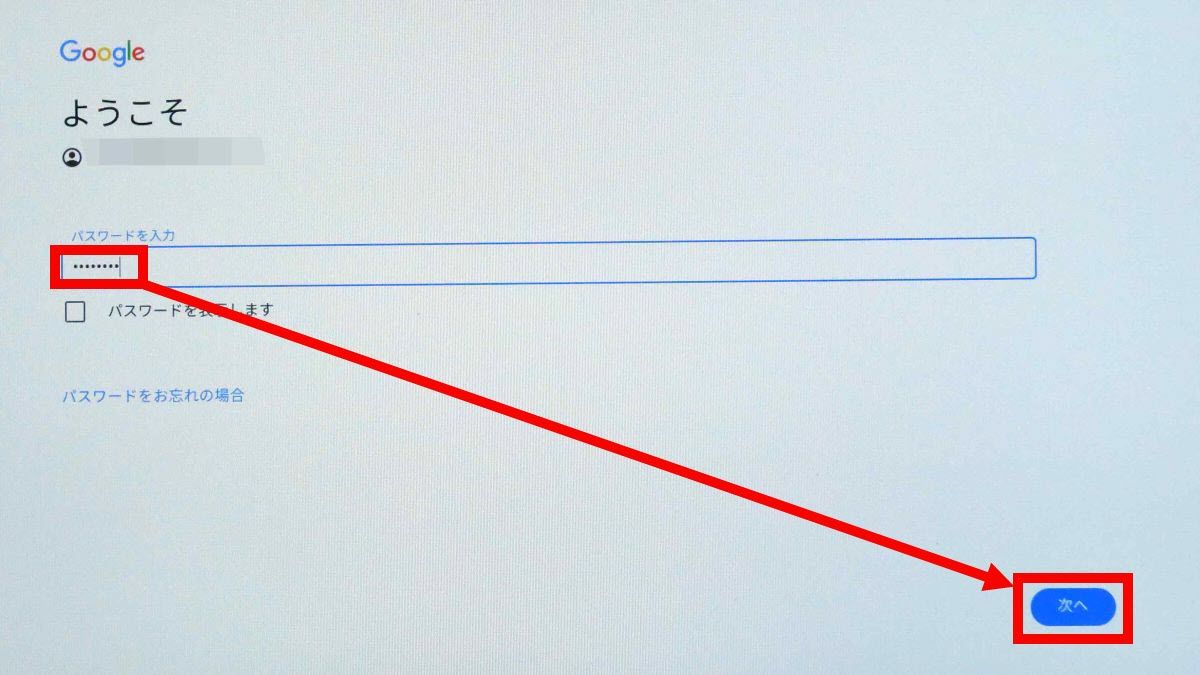
Enter the password and click 'Next'.
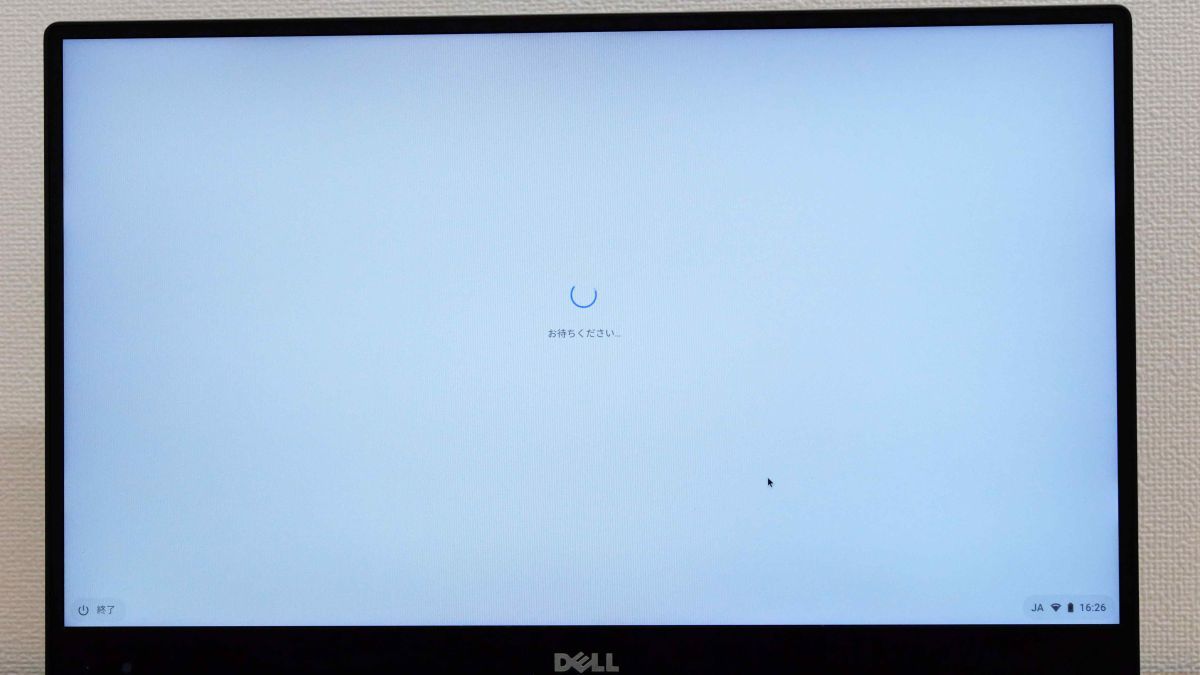
Wait for a while until the login is completed.
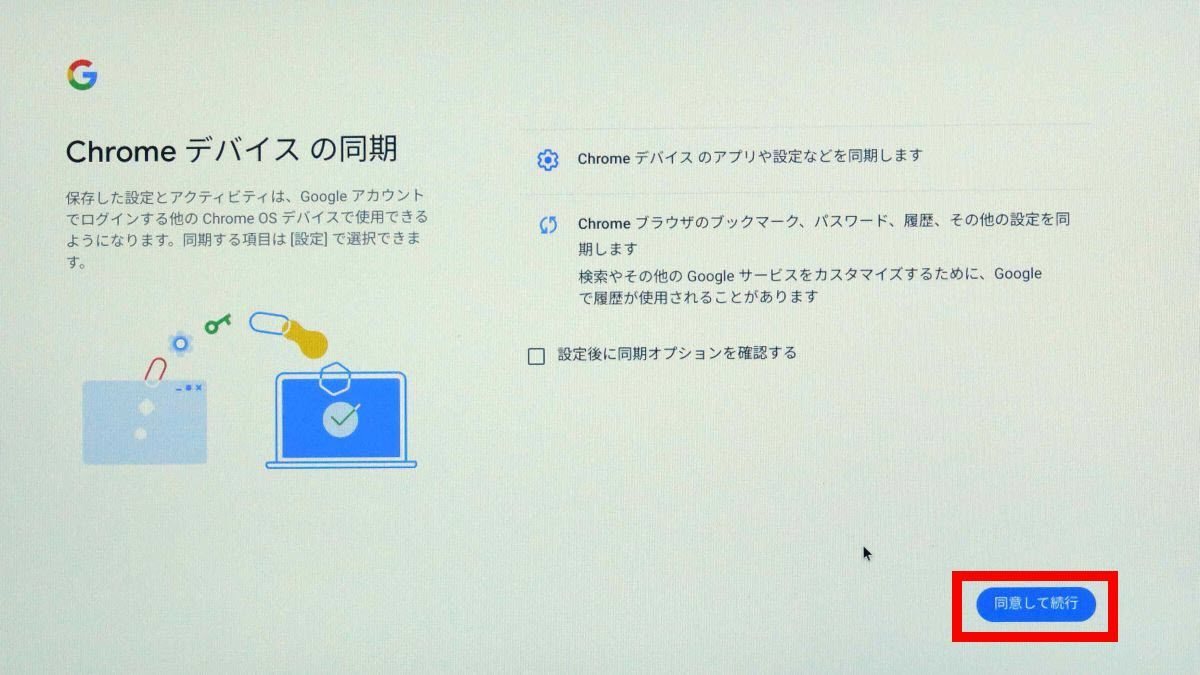
When login is completed, a synchronization confirmation screen will be displayed, so click 'Agree and continue'.
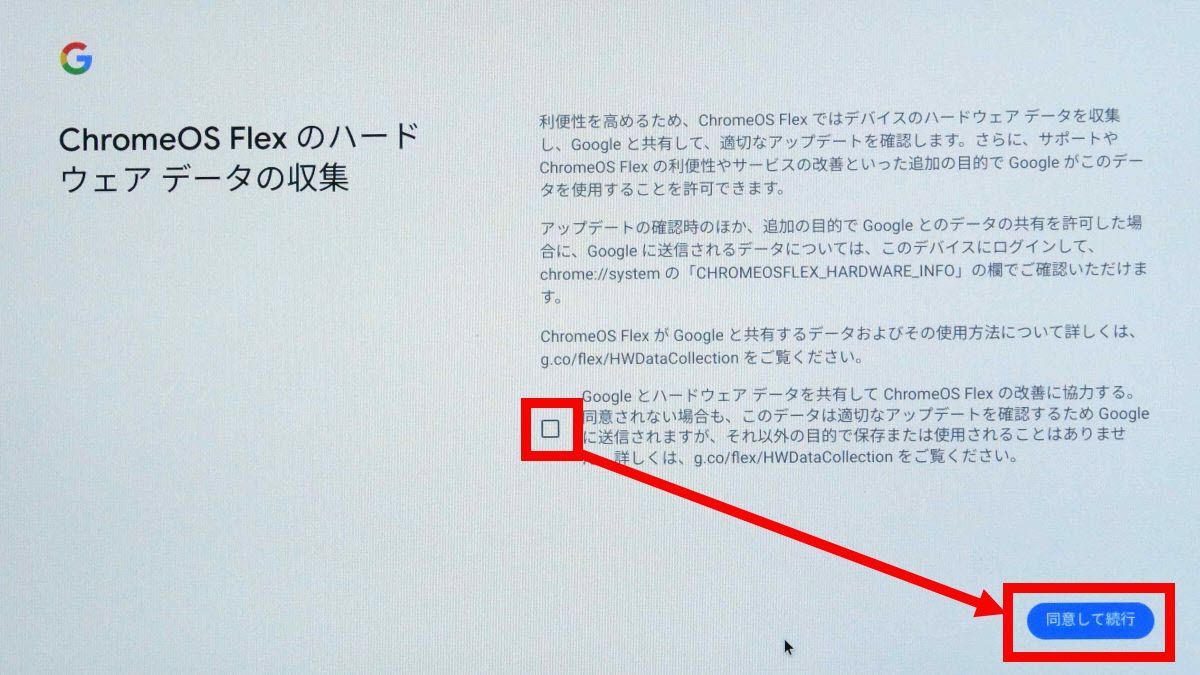
Next, you will be asked to consent to hardware data collection. This time, I unchecked the consent and clicked 'Agree and continue'. Even if the check button is switched on and off, the button notation does not seem to change from 'Agree and continue'.
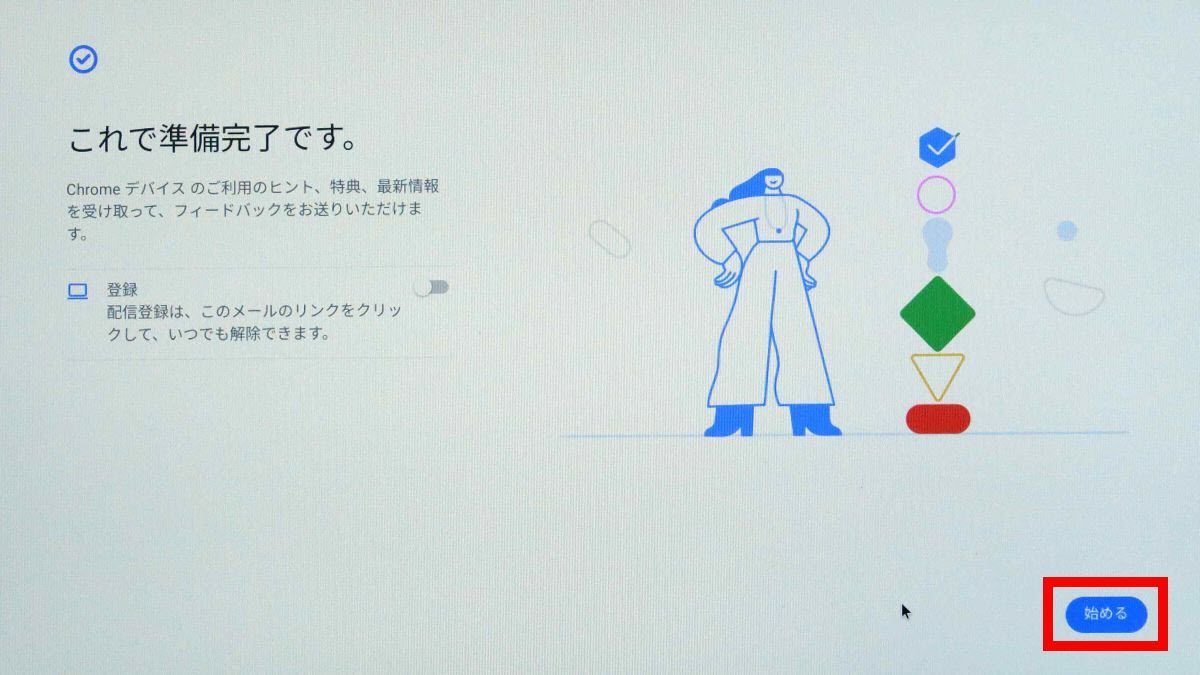
When 'You are ready to go' is displayed, click 'Start'. The initial settings are now complete.
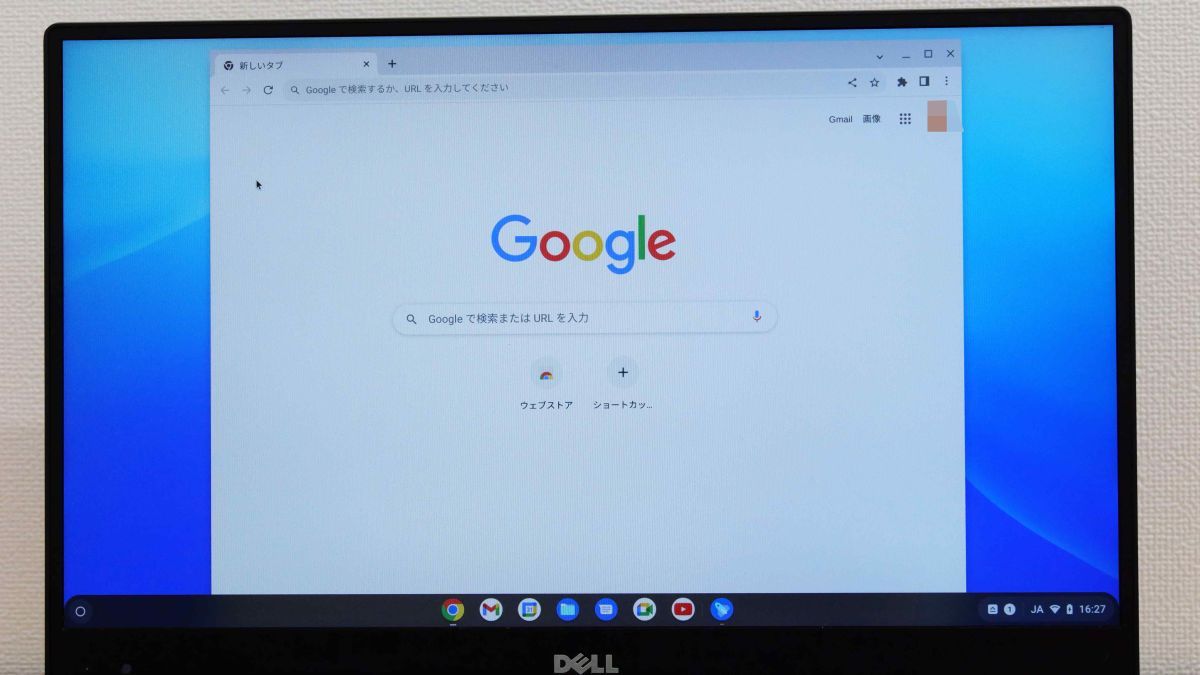
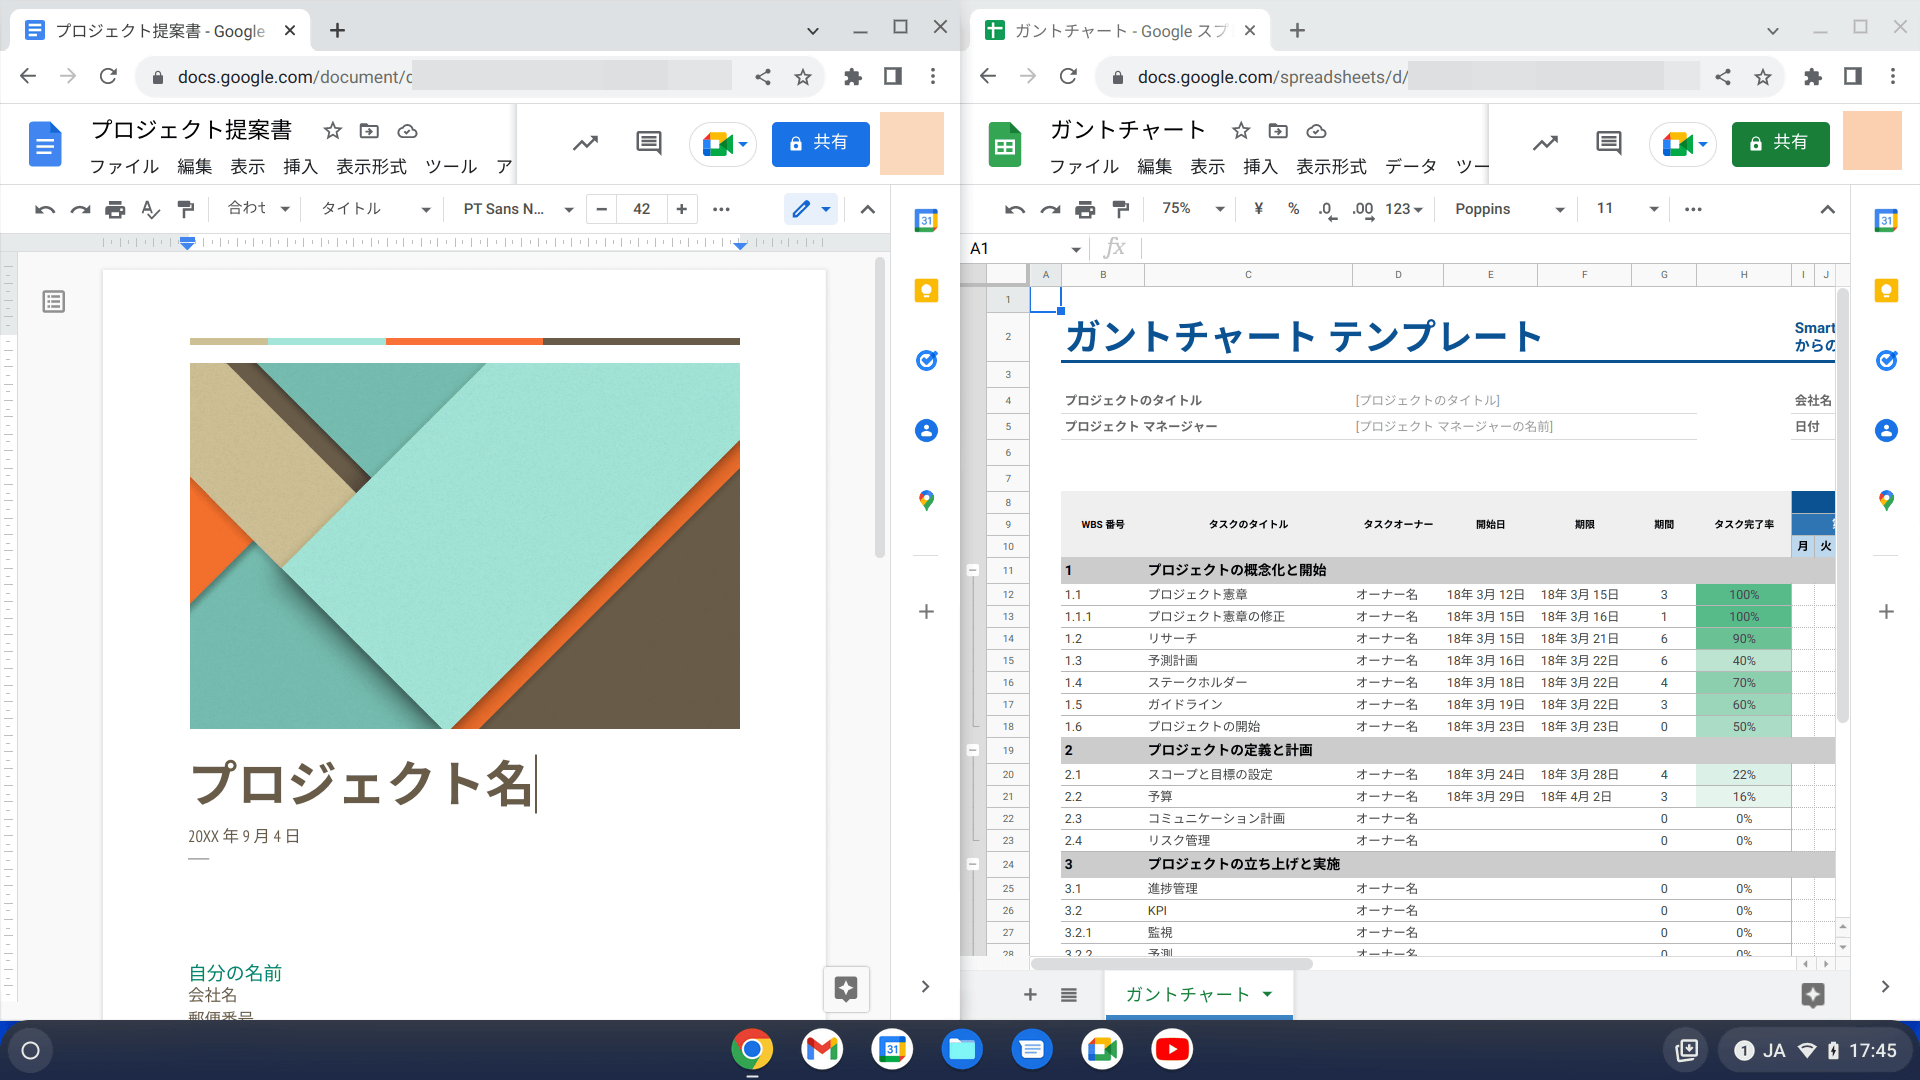
When the initial settings are complete, the desktop screen with the browser activated will be displayed.
◆ 4: ChromeOS Flex usability
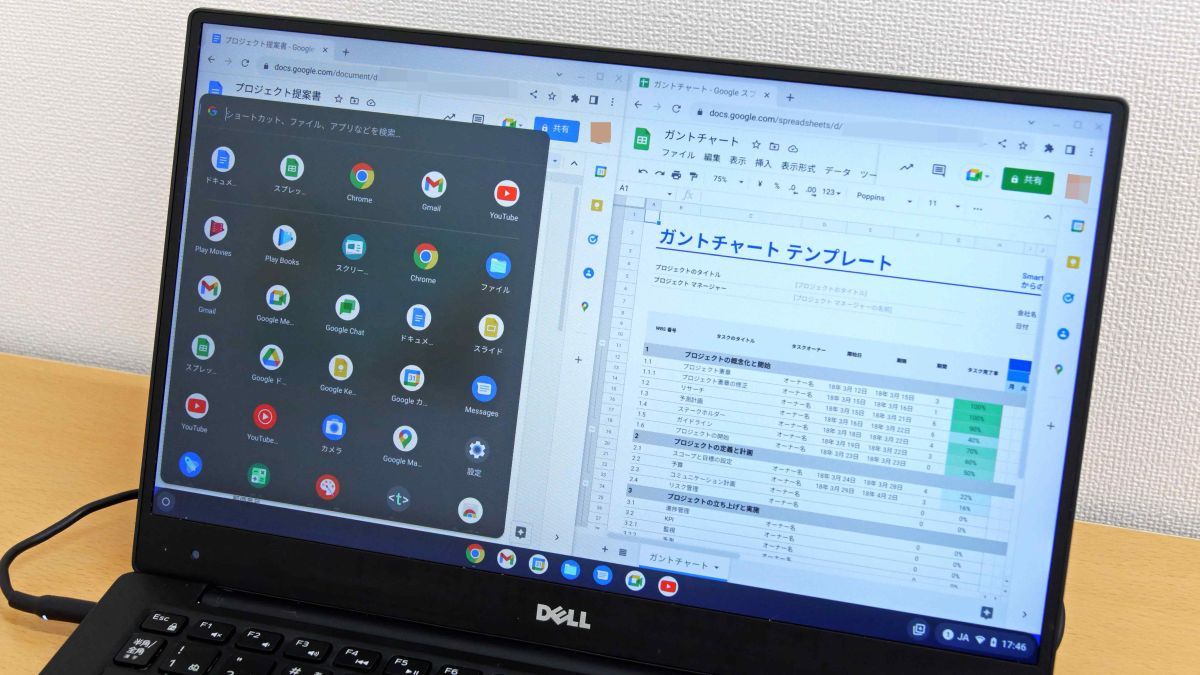
In a nutshell, a PC with ChromeOS Flex installed is 'a PC that can only use Google Chrome'. For this reason, you can perform tasks that you normally do with a web browser, such as web browsing, checking web mail, and watching movies on YouTube, without discomfort. It also supports installation of extensions, so you can supplement missing functions with extensions.
When I hear that `` I can only use Google Chrome '', it seems that there are many restrictions on the work that can be performed, but in recent years, desktop applications such as the writing web application `` Google Docs '' and the spreadsheet web application `` Google Spreadsheet '' Many web applications with functions that are comparable to desktop applications have appeared, and the timing of feeling inconvenient is less. In addition, many web applications execute ``high-load work that requires machine specifications'' on the server side, and it was possible to operate relatively crisply even on low-spec outdated machines.
Related Posts: