


There are different things that you can achieve in photography. Aside from capturing still images of static or fast-moving objects, you can also record patterns that can never be perceived in real-time. Light patterns, movements, and stellar motions are just some of the subjects that you can also be an expert in. This genre of taking photos is best known as long-exposure photography.
What is Long Exposure Photography?
Also called time-exposure or slow-shutter photography, long exposure photography involves slowly shutting your camera’s lens to allow a longer exposure to the light source. The result is a photo that is composed of two main elements: a blurred, obscured, or smeared shot of moving elements and a sharp, high-definition stationary image of elements.
What makes long exposure photography different from conventional photography is the length of time that the image is taken. Additionally, its slow shutter speed makes bright, illuminated objects more visible. These result in light streaks for lasers, car headlights, or flashlights, for instance. Shooting the stars using this method produces mesmerizing trails in the sky. When the main subject is flowing water, like in waterfalls or rapids, elements can appear smoother and softer. Objects that move more slowly, like grass or clouds, are blurred out to create surreal textures. Photographing architectures using long exposure produces a high-definition image of a structure against a blurry sky and soft cloud streak. A crowded street or urban center produces photos of ghost-like images for a more dramatic effect.
The next section will talk about the most beloved long exposure photography types and techniques that you should use for your first shoot.
Light Painting Photography
This long exposure photography subtype produces images, such as light paintings, light drawings, and light art performance photos. Most light painting photography highlights how one can create light paintings mid-air. It can be a text, a drawing, or a light sculpture masterpiece.

Easy Light Painting Photography Techniques
Find a good location. For this technique to work, the photographer should take the photo in a very dark studio or outdoor environment.
Choose your “art material.” You will need a medium that produces light. This medium should be easily turned on and off to give you the freedom to create a more accurate pattern or drawing. Don’t just settle with a single color. Most light paintings are streaks of yellow, red, green, and purple light. Be creative!
Try different light sources. Aside from a penlight, why don’t you try other objects, like a light-up ball or strobe lights in the background? Other materials that you can choose from are sparklers, LED lights, or go full Jedi and use a lightsaber? You can also do a collaborative art performance for a more exciting photo.

Practice your patterns. Before starting your shoot, make sure to plan ahead. Grab a pen and a piece of paper and draw some samples in advance. It will help you visualize the final image. You can also practice air painting, just to make sure that you are familiar with the movements that you have to make.
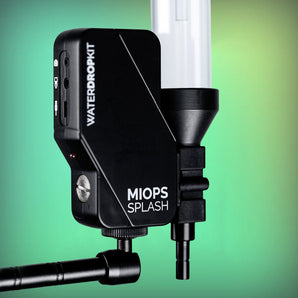
Long Exposure Water Photography
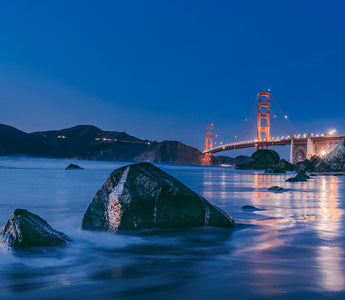
Water photography using the long exposure technique produces photos that highlight the smooth, silky, and soft movement of water. As a type of landscape photography, this genre’s most popular subjects are waterfalls, rapids, fountains, and ocean waves crashing into rocks.

Easy Long Exposure Water Photography Techniques
Plan your shoot. Planning should start by finding a good location. It’s also important to consider safety when doing this shoot because the settings are naturally found outdoors. Check the weather, go with a group, and read everything you can about the location.
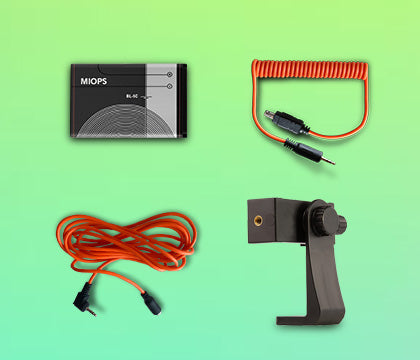
Complete your camera bag. Since most locations are far from home, you have to make sure that your camera bag has everything you need: your DSLR, tripod, lenses, filters, a camera weatherproofing kit, and extra batteries, to name a few.
Take impossible photos by turning your camera into a high-speed capture device!
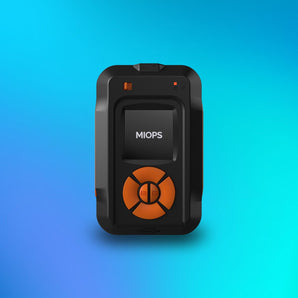
MIOPS SMART+
Use a smart camera trigger for long exposure photography. It’s also important to bring a remote camera trigger. A wireless camera trigger will not only make sure that you can trigger your camera’s shutter without disrupting your composition. It will also reduce camera shake, eliminate blurry images, and help you click the trigger from a safe distance.
Smart camera triggers even have a specialized Long Exposure Mode to cater to the specific needs of long exposure photography. MIOPS camera trigger, for instance, allows users to control every aspect of the shot remotely through a dedicated smartphone application. These aspects include the shutter speed, shot interval, number of shots, and elapsed time, among others.
Make your shots stand out. Find a good location for your tripod and position your camera. Choose whether a low-angle or a high-angle shot can frame that composition that you want. Wade into the water, find a flat rock where you can secure your tripod, or find an interesting angle for a more unique shot.

Adjust your shutter speed for variety. You don’t have to stick to a fixed shutter speed. Adjusting and trying out different shutter speed levels can produce different effects. You can either aim for more “turbulent” looking water patterns or keep it calming with a smooth water effect.
Long Exposure Car Light Trails Photography
Car light trails photography are most popular for urban shutterbugs who want to capture the vibrant and dynamic city lights of their metropolitan homes. Through long exposure photography, lights from fast-moving vehicles produce hypnotic patterns and light sculptures that are achieved using the same slow-shutter method. The best thing about this subtype is that no photo is the same. In contrast to photographing water movements, take long exposure shots of car light trails to produce unique, unpredictable images.

Easy Long Exposure Car Light Trails Photography Techniques
Find a good spot. Just like other long exposure photography shoots, you have to find a great spot where you can position your tripod. However, since the setting is in a busy urban site, the challenge is finding a location that is worth your time and effort. A higher location that gives you a good view of a busy highway should be perfect. Bridges, skyways, and tunnels are popular car trail photography locations.
Frame a good background. Aside from finding a busy road with lots of traffic, framing a good background can make a huge difference. Try shooting your image against stunning architecture or a cool building. Do you have areas with unique intersections and roundabouts? How about a great view of the mountains and a starry sky?
Use what’s available. Now that you have a subject and a good background, why not make your photos more exciting by adding other elements to the view? Use what is available. A silhouette of a tree, a profile of a powerline, or anything interesting, like this shot below.

Use the right camera settings. For any light trail photography, you have to use the right camera settings. Aside from eliminating instances of missed shots and blurry images, the right settings will make post-processing easier. For starters, always shoot in RAW. Your ISO value should be set to the lowest. Depending on the absence or availability of light, set your aperture within the range of f/4 to f/11. Most importantly, your shutter speed should be set from 10 to 30 seconds.
Star Trail Photography
Saving the best for last is star trail photography also known as astrophotography. This long exposure technique helps photographers capture the enthralling movement of the stars. This long exposure photography type produces images that show the individual star streaks in the night sky, patterned according to the Earth’s rotation. Longer exposures will also produce longer arcs and clear, brighter stellar patterns.

The fascinating images from astrophotography often intimidate beginner photographers, but many who have tried this technique can agree that it’s actually quite simple. You just have to have the right camera equipment and patience to complete the work.
Easy Star Trail Photography Techniques
Find the darkest places on Earth. Or at least find the darkest locations free from the city’s light pollution. The success of your star trail photography shoot will depend on this. Naturally, you capture the stars under a dark night sky and your only source of light should be the stars alone, nothing else. A single light source could ruin your shot and corrupt your image. If you want to find the nearest location to take star trail photos, you can research online and ask photography communities for the best recommendations.
Timing is everything. Aside from making sure that you’re away from well-lit cities that can corrupt your images, watch out for another natural light source: the Moon. Professional photographers know very well how to choose the right Moon phase when scheduling a star trail shoot. So when is the best time to plan your overnight camping trip to shoot the stars? During a New Moon when there is no moon in sight. Additionally, make sure that the weather is fine and under a clear night sky. Check for weather and cloud updates.
Pack the right camera equipment and settings. Aside from bringing the basics, such as a DSLR capable of “Burb” Mode, tripod, a wide-angle lens, a remote camera trigger, and extra batteries, you should configure your camera settings.
Make sure that you turn off your camera’s noise reduction to avoid gaps in your trails. Switch to Manual Focus so your camera won’t try to constantly adjust the focus during the shot. Your image stabilizer option should also be deactivated once you place your camera on your tripod.

Unlike other long exposure shots that can be completed in minutes, the duration of star trail photography can last hours. This will depend on the results and pattern length that you want to achieve.
Additionally, choose between going for a single shot or stacking. Stacking allows you to shoot multiple images and “stack” them later, using a computer software, during the post-processing stage. This option also produces a more defined and sharper photo compared to a single-shot image.
Locate the Poles by finding Polaris. Would you like to capture a more circular stellar motion? The best way to achieve the image featured above is by locating the Poles. Aiming your camera towards the northern sky where the North Star or Polaris is will give you a circular pattern of the star movement. You don’t have to be an expert in astronomy to find Polaris. Modern devices, such as your smartphone, can point you in the right direction.
Exploring other types of Long Exposure Photography
The types of long exposure photography are not limited to the genres listed here. There are still other types of long exposure photography that focus on different landscapes, seascapes. These include long exposure techniques that capture architectures and people. Instead of focusing on the colors and saturations, the most famous long exposure images for this photography subtype are shot through a black and white filter. The resulting images often look surreal yet familiar.

Instead of images of light, water, and the movement of the stars, these subjects reveal settings and sights that are more relatable to the viewers. The subjects and scenes are glimpses into the reality of everyday life, as told using the language of fading patterns and blurry silhouettes. Every image tells a different story and the spectrum of images produced using this technique makes it an ideal method for street and urban photographers.
Taking Your Long Exposure Photography to the Next Level
This article highlighted the types, techniques, and endless potential of using long exposure techniques to produce stunning, unforgettable images of people, nature, and structures. As mentioned several times in the earlier sections, proper planning, creativity, and having the right camera gear are the three fundamental factors that can help you complete a successful shoot.
However, aside from relying on the usual items in your camera bag, there is one more step that you should take to produce the most extraordinary images for your award-winning photography portfolio: securing the most intuitive long exposure camera device in the market. To get started, check out MIOPS’s top-notched tools and smart devices that can make long exposure photography a lot easier!
Blog Credit: Charm Villalon
Charm is a writer and a visual artist. Her drive to share ideas and stories is evident in her background in communication arts and language studies. Years of professional experience in content creation have given her a broad proficiency with the process of engaging online communities. An appreciation for multiple languages and cultures drives her to seek out experiences and capture these moments through her writing, digital art, and photography.